Schedule Module FAQ’s

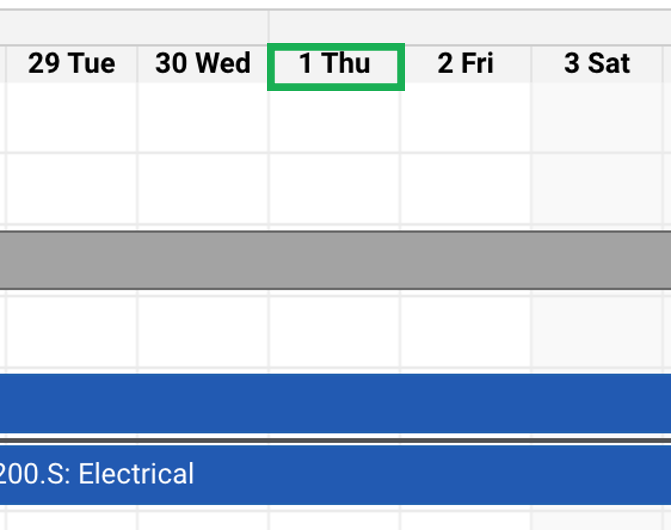
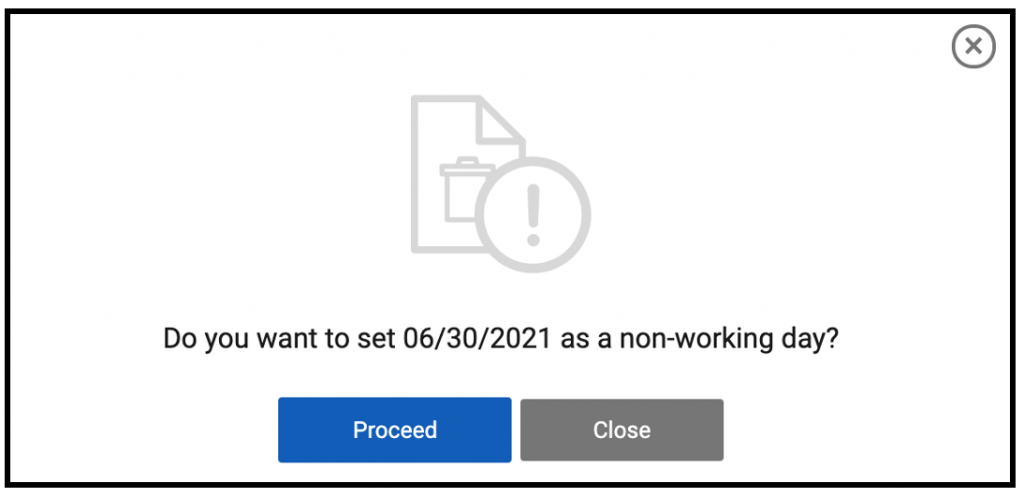
How do you set non-working dates (holidays)?
You will still click on the date at the top of the schedule and designate if it is a workday or not.

How do you link in sequence?
You can link manually by clicking the circle next to one task and dragging to the task you wish to link or (cautiously!), or use Link in Sequence button at the top of your screen. Clicking Link in Sequence will link all Tasks in a Finish to Start relationship between the first task and last task on your schedule.

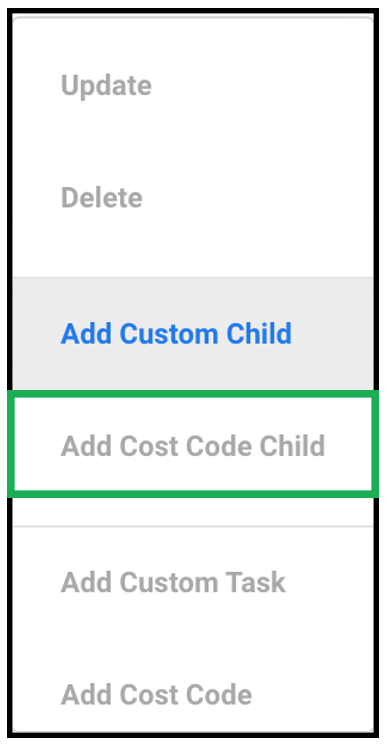
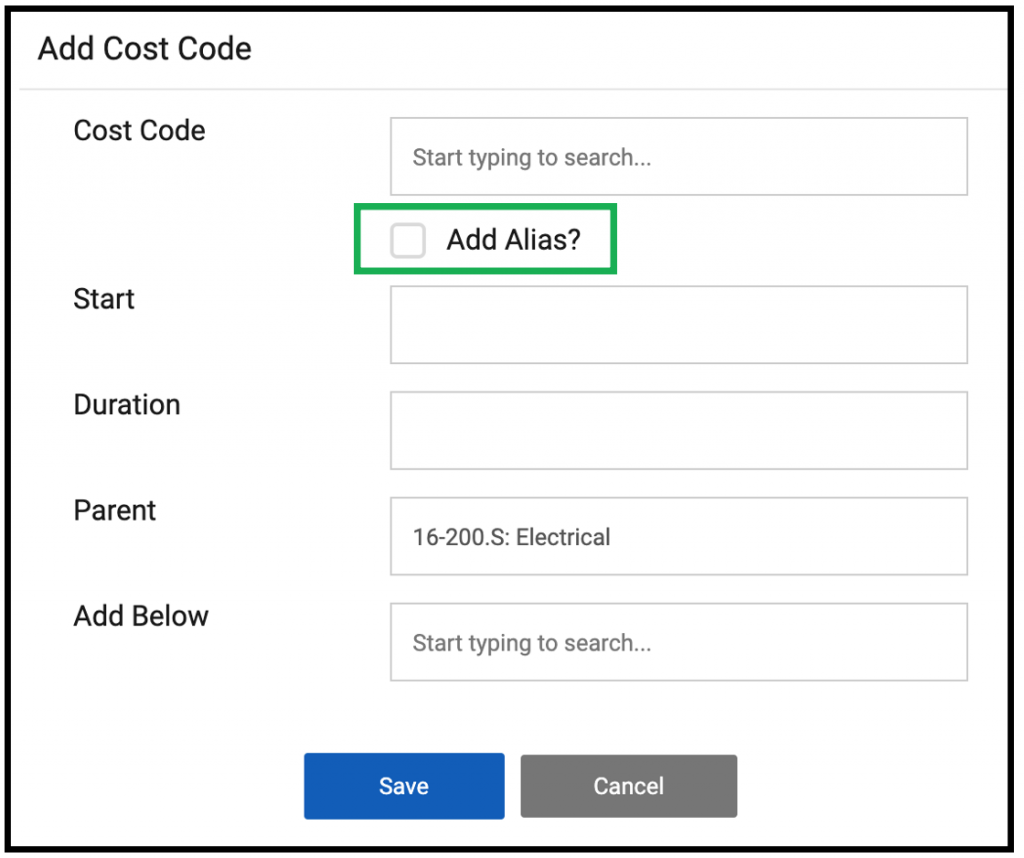
Can you adjust the Task name to reflect the action being completed for that Task on the left-side list of activities?  For example the your task is Electrical Rough In vs Electrical Finish?
Yes, when you click on Add Child Task you will select the Cost Code, then check the box to include an Alias.  The Alias will be used on the left-side menu to indicate the Task.

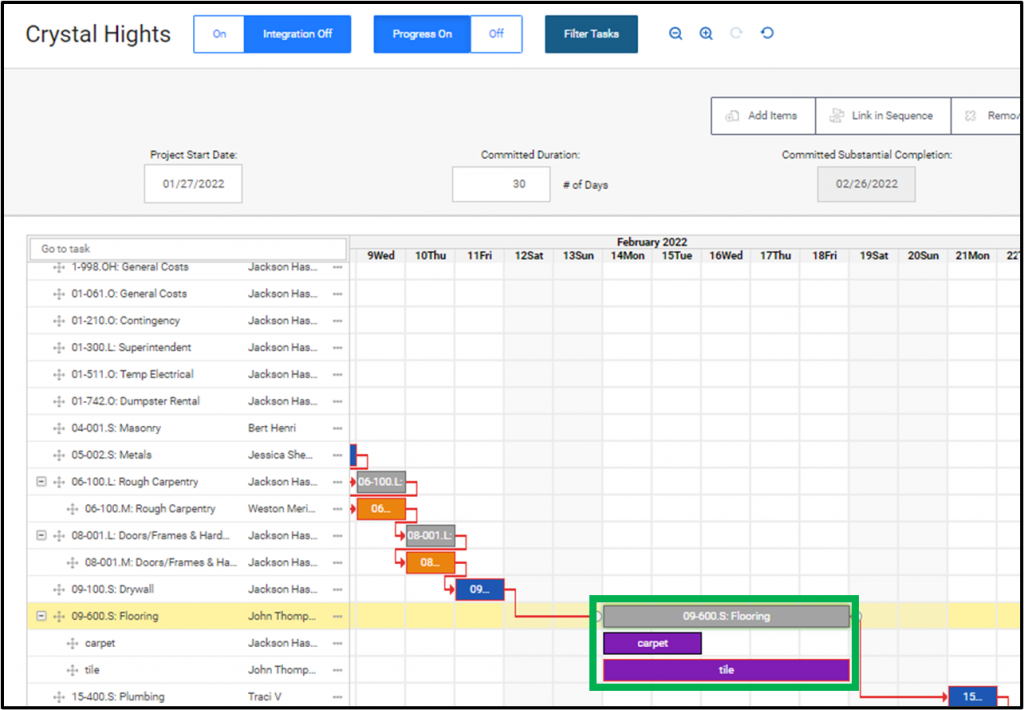
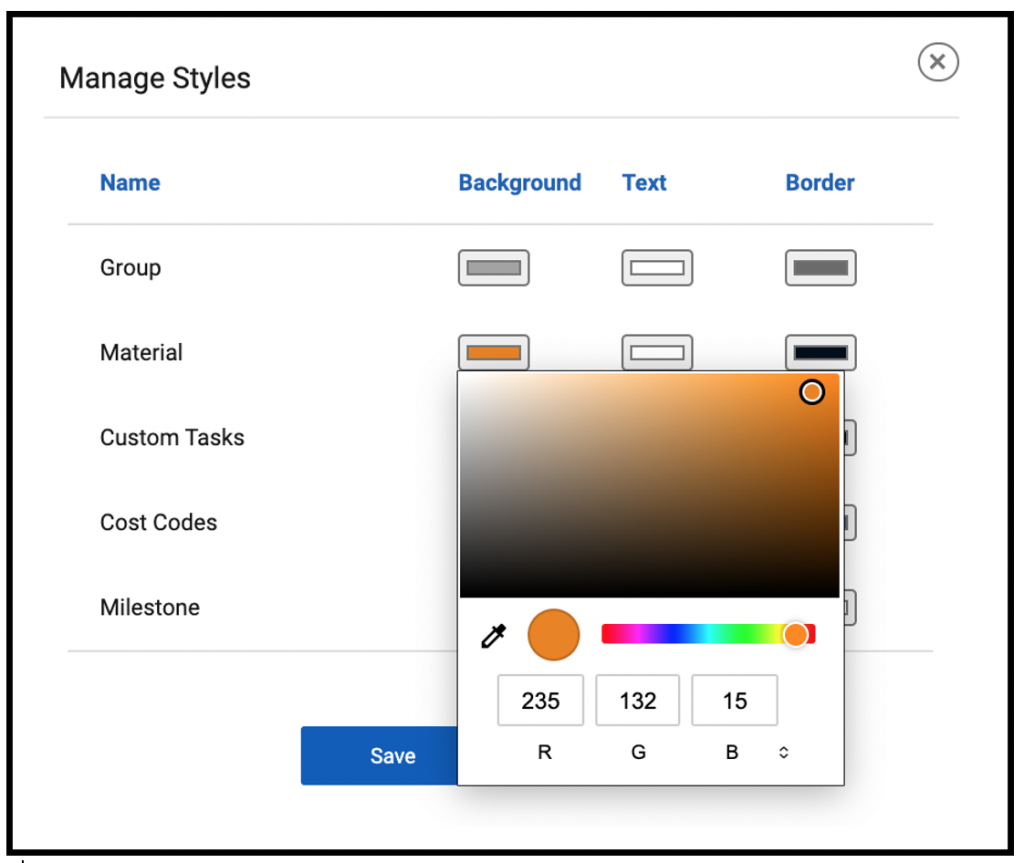
Are we now able to color highlight the individual tasks bars now?
Yes, click Administration>Default Templates>Schedule Templates>Manage Gantt Styles to designate the colors for Scheduled Task Colored Day.

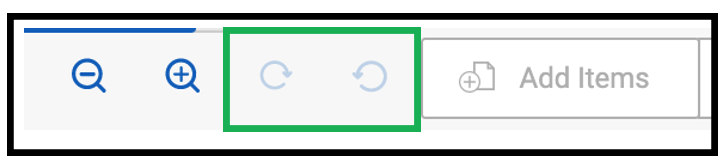
Is there an undo button?
Yes, on the Top Menu you will see the Undo & Redo buttons.

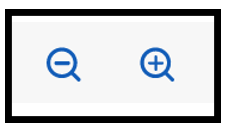
On the gantt view can we change it to week view rather than daily so the print will fit on one page?
Yes, you can use the magnifying glasses at the top to zoom out to a week or month view, zoom in to show the days.  When you print if zoomed out, it will print the view on screen.

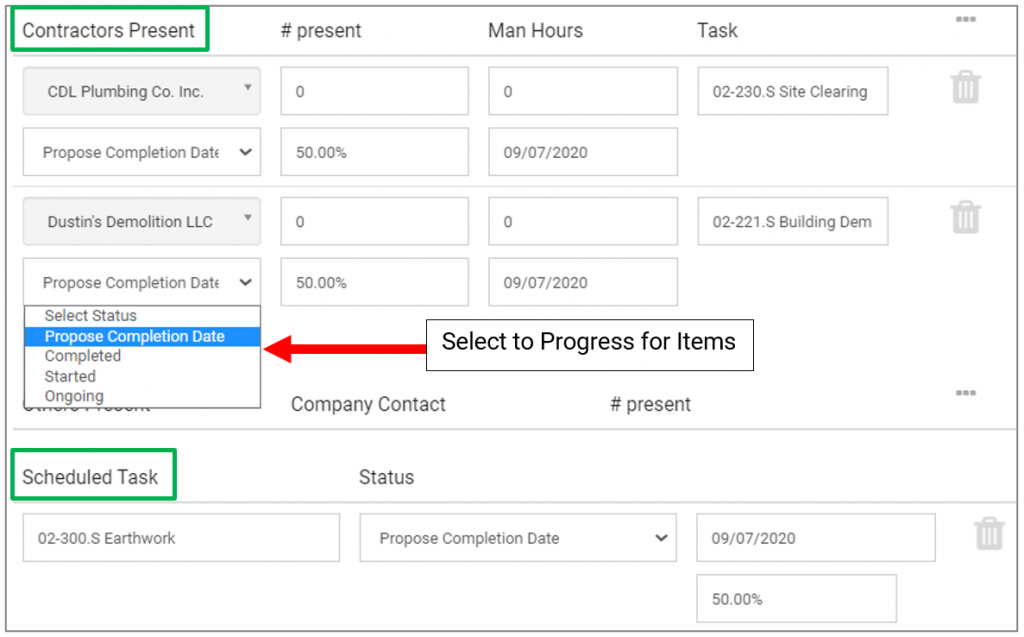
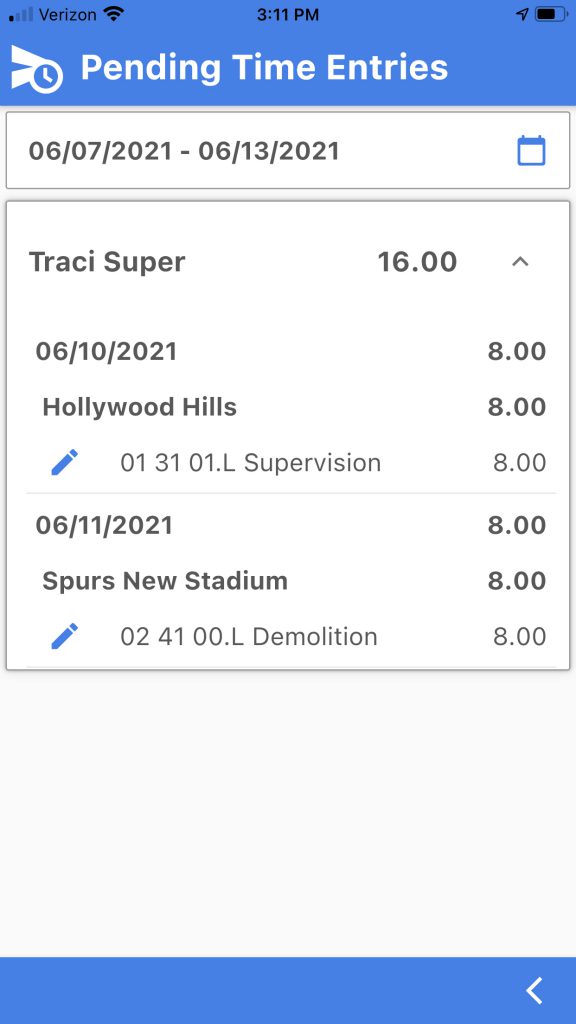
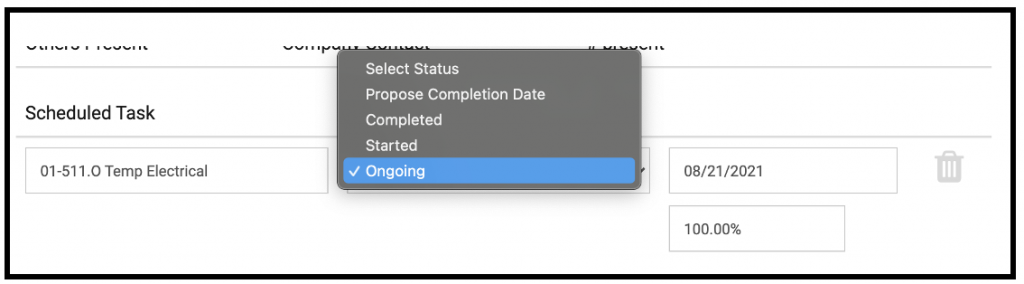
In the previous version of the Schedule, the Tasks show in the Super’s daily to update at the end of each day.  Is that still the case?
Yes, you will still see them on the Daily Log. Superintendents will mark them as Started, Completed, or Propose Completion date, or Ongoing.

Do you have to be an Administrator to have that Add as a template option?
No, you do not have to be an Administrator to Add as a Template. You do need to be an Administrator to create a new template from Administration.

Does the Schedule print as a PDF?
Yes, all schedules will print to PDF for download or Saving to Uploaded Schedules.

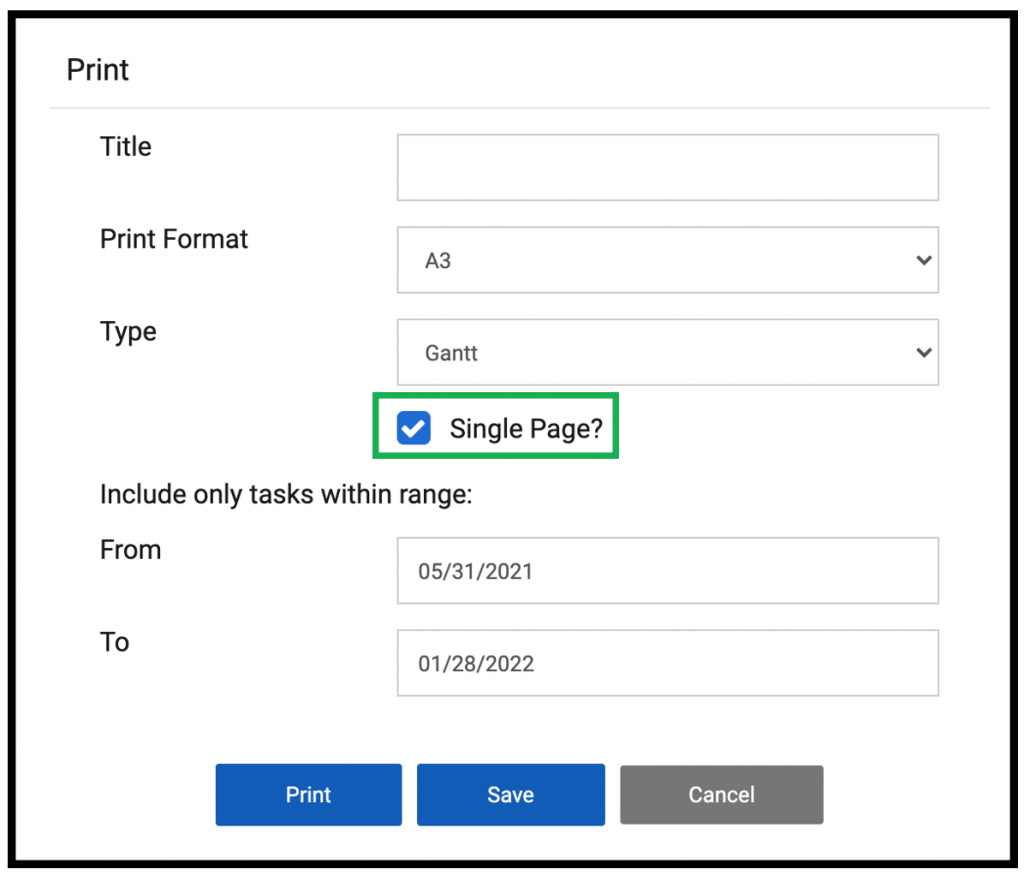
Is it possible to print to one page, fit to page?
Yes, you can Print to one page.

How Does The Scheduling Integration Portion of The Daily Logs Work?

If Scheduling Integration is turned on, the Daily Logs will ask the progress of the ongoing tasks each workday. If there are new proposed dates that will affect the project timeline, these will be shown to the PM on the Schedule Variance page. Project Managers can Accept or Reject the proposed changes, or proactively manage the tasks to bring the schedule back into compliance.

TURN INTEGRATION ON/OFF IN SCHEDULE

  • Toggle the daily logs/schedule integration to on. 
  • Create a daily log for the day. Tasks that have already been In progress/completed will display on daily logs.  
  • Click date on daily log to propose changes, then save daily log, and submit to Project Manager.
  • A notice will be sent to the Project Manager to direct them to the Proposed Changes screen.

UPDATES TO SCHEDULED TASKS FROM THE FIELD

  • The Superintendent can update the progress of Scheduled tasks from the from the Daily Logs, using either the RedTeam Go Mobile App or Web Version.
  • Subcontractor awarded items them will appears in the Contractors Present Section
  • All other Items will Appear in the Schedule section
  • Select the Status of the Tasks; if you choose to Propose a new Completion Date, select the date from the calendar after selecting.

PM COMPLETES SCHEDULE DELAY ON PROPOSED CHANGES PAGE

  • If the Superintended has Proposed new Dates of Completion, the Project Manager will be presented those Changes.
  • From Proposed Changes, click the yellow line to review proposed changes:

When PM goes to Proposed Changes screen from the Daily Log link, the page will open on Current Schedule.  There can be multiple Daily Logs listed and can be multiple proposed changes on each Log. Clicking on the date will automatically deliver the user to the first task in that grouping. Previously they had to click the task itself to move the frame. 

Click on the date with the suggested changes (Note: Changes not in the Critical Path will be highlighted with yellow and grey striped boxes, while tasks within the Critical Path will be highlighted in Red and White striped boxes).

  • Click Approve Selected to approve changes and adjust the project schedule.
  • Click Reject Selected to keep schedule as-is.
  • Select Notify Affected Contacts to send out automated updates to the subcontractors and team members to advise them of Task dates that have changed.

If the PM would like to discuss the change with the responsible party prior to Approving or Rejecting changes they can double-click the task to open the Details Modal and click Email Assigned.   

Can I Add A Group of Activities To My Schedule?

Yes, Schedules includes the ability to use Groups for both Parent Tasks (children with same cost code) and to replace Summary Bars which could be used to group multiple cost codes and custom tasks together.

  • Parents and Summary Bars on Migrated schedules will both be converted to Groups.
  • Groups take on the duration of all the cumulative tasks grouped within them.
  • Adding Custom Child or Adding Cost Code Child to any task from the Ellipses on the new schedule will automatically convert that task to a Group.
  • Groups can be collapses while you work on screen or when Printing by clicking the minus sign next to the Group name.
  • HINT: Groups will not be included in the Daily Log Integration.  If you have the Parent task linked on the schedule, you will need to update the relationships so completion of the Child Tasks will factor into Proposed Schedule Changes if those tasks are delayed.

Can I create Child Tasks similar to the “old” Schedule Module?

Yes, you can add Child Tasks. Here’s how:

  • Click the Ellipse Icon > Select Add Cost Code Child.
  • Start to type and select the same cost code as the Parent code:
  • Check the Alias Box and add new description to the child task, (the parent cost code will list after the new description)
  • HINT: Remember that the Parent will become a group so you will need to add all Child Tasks needed to completed the Group on the Schedule (these Child Tasks will be tracked on the Daily Logs integration).
  • Enter Start Date and Task Duration
  • The Parent cost code will already be populated
  • Select the Group task you would like the new child to fall under (Note: the only choice will be the parent Group if it is the first child added).

Why isn’t the Cost code Box populated with the Parent Cost code already?

There is a second Child Task option called Add Cost Code Child which is to add DIFFERENT cost codes to a Group. Since Groups replace traditional Parents (same cost code only) and Summary bars, multiple cost codes, custom tasks and milestone can be included in them.

How to enter Time through the Mobile App and enable Geo-location

In RedTeam Go’s Time Card Module via the RedTeam Go Mobile App, employees with an hourly employee designation will be able to enter their own time on projects right from their phone or smart device. Superintendents will also be able to enter time for themselves as well as other hourly employees.

From the home screen, employees will click the clock in the upper right-hand corner to clock in and start time for the workday.

Enter the Date>Time>Project>Cost Code>Clock In.

You can also use the slider at the bottom to “Remember this project.” Using this feature will remember this time entry when you clock out.

From the main menu, you can also click on Time Cards to open the Time Cards portal.

Within the Time Cards portal the “Clock In” button is still at the top just like the main menu screen.

Click “Clock In” to enter date, time in, project, and cost code. Use the “Remember this project” slide to pull project automatically for future clock ins and outs.

Clicking “Create Time Entry” allows you to enter time for yourself. Choose date, hours, project,  cost code, and save. This entry will be added to “Pending Time Entries.”

Click “Pending Time Entries” will display all time cards that are pending approval by a Project Manager. Time can be edited up until it is approved.

“Approved Time” will show all time cards that have been approved.

“Settings & Reminders” will allow you to turn on geolocation and remind you to clock in/out when entering the geo-fence of your project location.

When clicking “Clock Out” you can do this from within Time Cards as well as from the main menu.

Clicking “Clock Out” will open the window to show the time in from earlier in the day. Click in “Time Out” to enter the time and it will auto calculate the hours.

Clicking in the “Time In” or “Time Out” boxes will open a clock to easily adjust time to calculate hours.

Click “Clock Out” to save information.

Click “Ok” to confirm time submission.