

- Home
- Upcoming Live Training Sessions!!
- Webinar Recordings
- Implementation Courses
- Getting Started Guide For Admins
- RedTeam Go Navigation
- Gear Icon
- Administration
- Contacts
- Projects
- Planroom
- Estimate (Base Bid)
- Bid Invitations
- Proposal Package
- Construction Buy Out
- Contracts
- Daily Logs
- Photos
- Billing
- Schedules
- Submittals
- Transmittals
- Request For Information (RFI)
- Potential Change Orders (PCOs)
- Change Orders
- Owner Change Orders
- Subcontractor Change Orders
- Internal Change Orders
- Meetings
- How Do I Add Meetings?
- Close Out
- Job Costs (Purchase Orders & Expenses)
- Required Documents
- Accounting
- Reports
- Superintendent
- Subcontractor
- Architect
- Owner
- Mobile
- Release Notes
- Glossary of Terms
- Accounting
Hello. How can we help you?
How Do I Print A Schedule report?
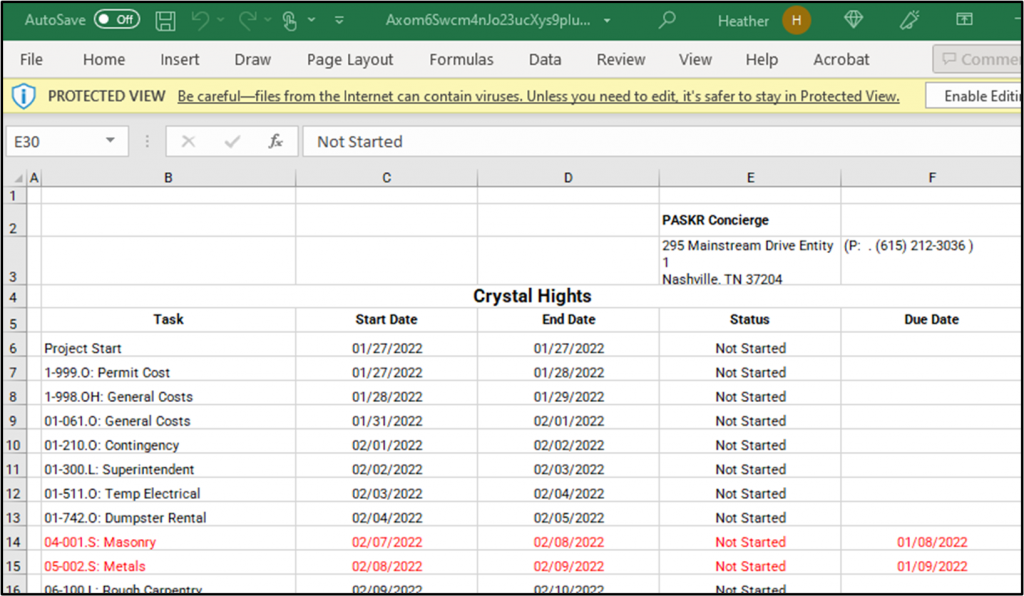
Print Report version is an enhancement that allows the PM to view tasks in excel and print to PDF report form, as well as Save version to the Baselines>Uploaded Schedules area. This report is designed to include Due Dates entered on the Task Details so it can be used to identify Overdue tasks. It can be customized from the Gantt chart view using the Filter option. This enables the user to choose to include all tasks, just those in the Critical Path or to choose one or multiple resources to display on the report.
- Print Report will open to excel to edit as desired
- Print to PDF from excel and then add to Baselines>Uploaded Schedules
- Saving directly from the Print area will upload the excel version


How to build this report.
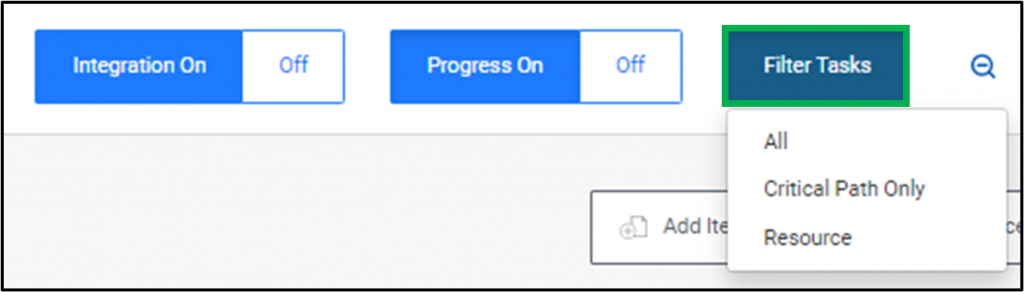
Filter task and choose a layout.

If you choose by resource click in the box and select contacts or start to type to narrow suggestions. If you do not see the desired resource check to make sure you have assigned tasks to them either via subcontract award or by assigning them on Task Details.

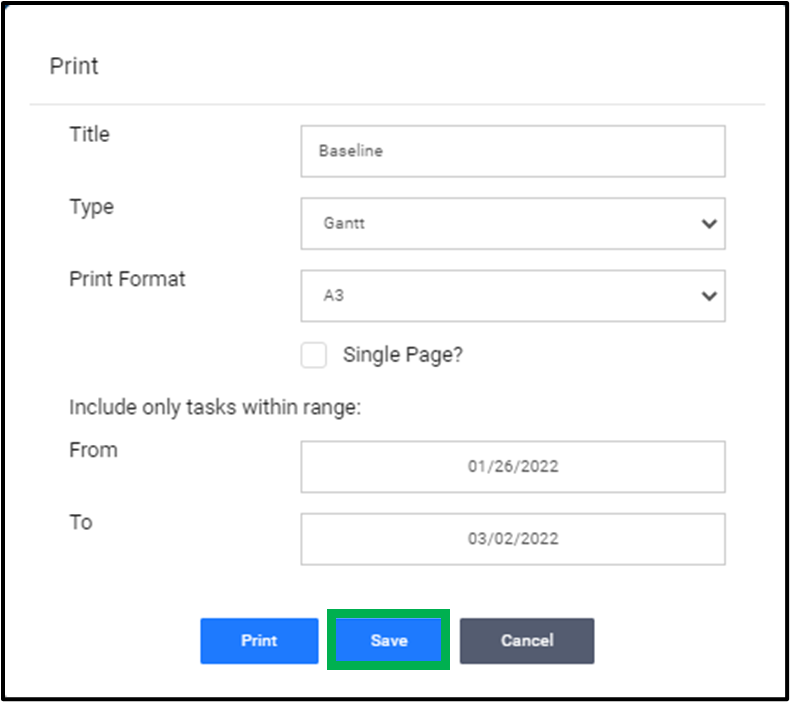
Provide a Name and select Report from the choices.

Select the desired date range. Dates will default to full Schedule length. Then select Print or Save options.

How Do I Print My Schedule
RedTeam Go offers multiple ways to print a schedule. Options include printing a Gantt chart, a calendar view, and an excel report.
Click the print button

Choose the type of schedule print, the print format and date range.
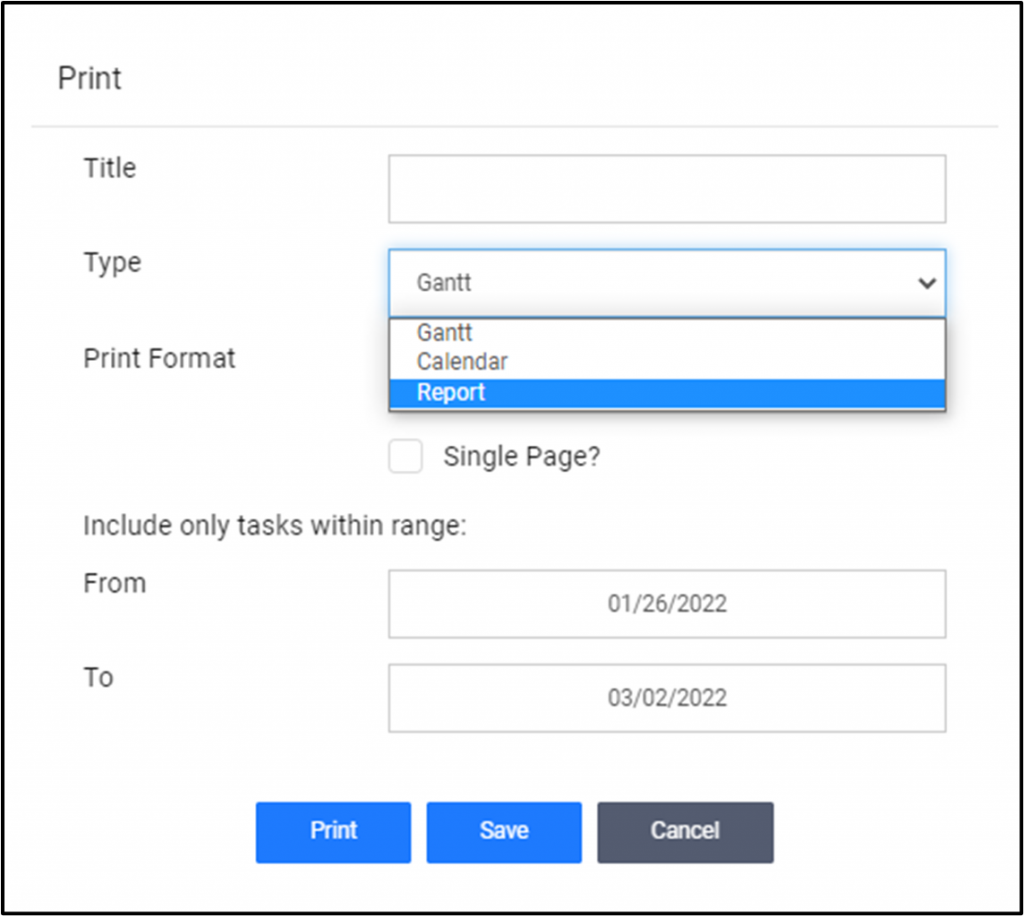
Report: choose the dates range

Gantt chart print:


Print calendar
The Calendar feature will print up to a four-week schedule.


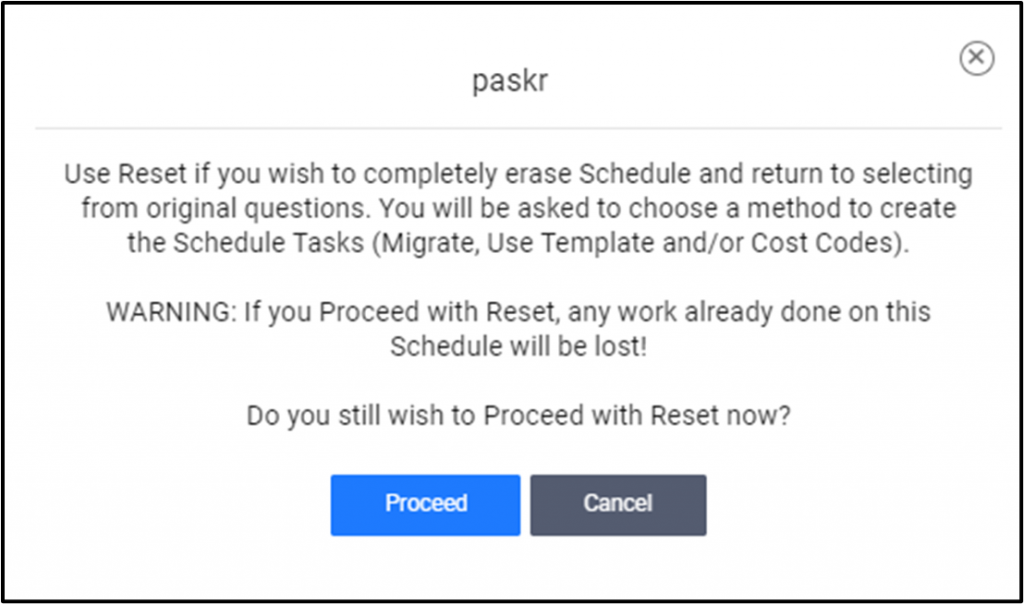
How Do I Reset My Schedule?
Users can now reset a schedule back to the original questions without having to contact support and create a ticket. This will take users all the way back to the creation slide to determine the method they wish to use to build the schedule tasks. If they had a schedule created in the old Scheduling module it will ask if they wish to Migrate that schedule. Otherwise, they will be asked if they want to use a template from Administration, Cost codes from the Project or a combination of both.
How Do I See My Progress On The Schedule?
Progress toggle to turn this view on and off has been added. This is primarily because the Print outs show whatever is onscreen. Seeing the 2 colors could be confusing to those who view a Printed schedule so the PM can easily turn this view off with one click.

With Progress toggle off:

How Do I Filter The Schedule?
Users can now filter by Critical Path and by Resource.
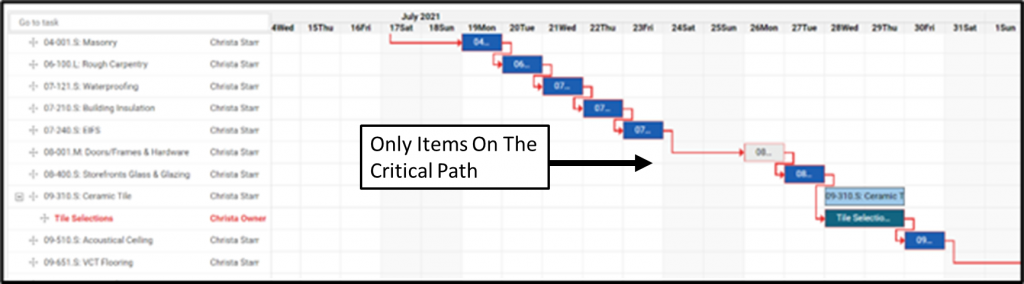
Viewing by Critical Path Only (items linked by red line) will hide the tasks that are not a part of the shortest path to project completion.
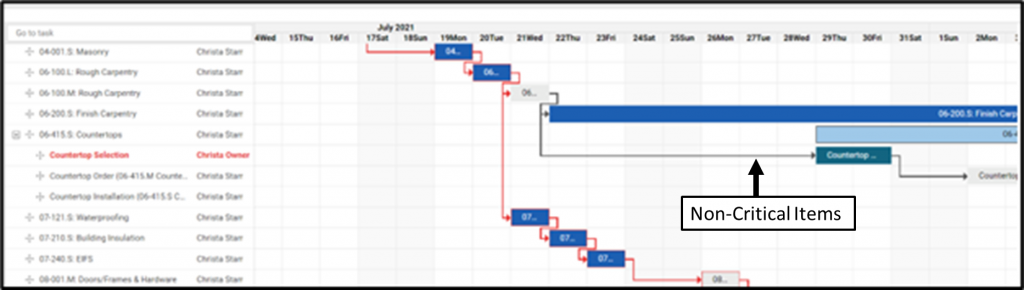
Critical Path only:
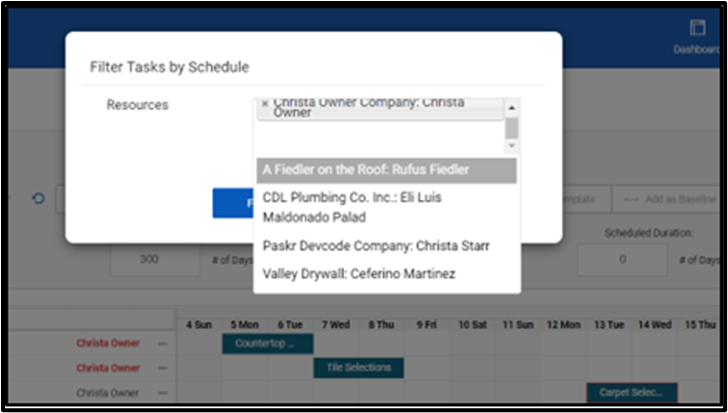
Viewing by Resource allows user to select the names of Subcontractors, Owner, Architect, Employees, etc. that are assigned to tasks as the responsible Resource in the Task Detail modal. Multiple contacts can be selected to display onscreen. Selecting to Print in Gantt chart format will display on those tasks on the printed Schedule.
Filtered to show just the Owner’s tasks:
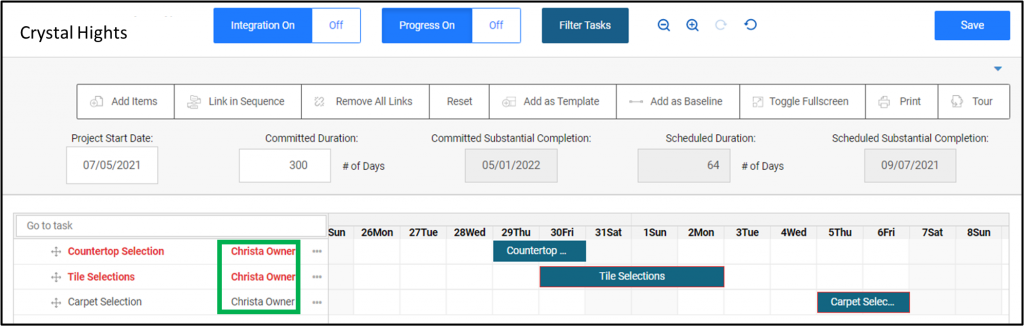
How Can I Show The Schedule Resources?
You can now expand the task column to see affiliated Resource on schedule. Click on the line and drag right or left to display/hide resource. Resource name will also appear on left hand of the printed schedule if visible on screen.

Collapsed to hide Resource:

Can I Create A Baseline Schedule And Compare It To The Current Schedule?
Yes, you can!
First to save a baseline click Add as Baseline.

Name the Baseline.

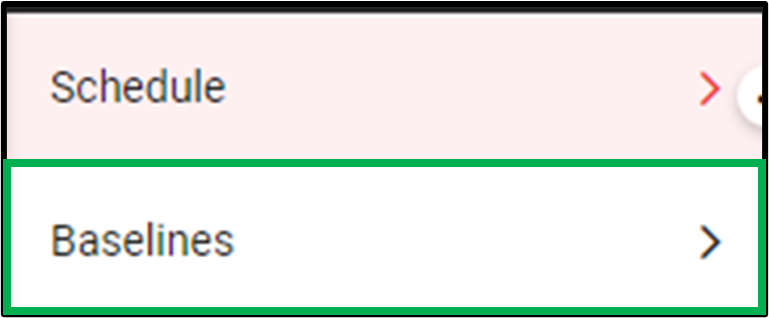
Once saved, the baseline can be viewed from the left side menu under Baselines.

Click Baselines to see the list of saved baseline schedules. Select a baseline schedule to view
The selected Baseline will automatically show in comparison mode with the current schedule.

Yellow Lines indicate the task’s original position on the baseline.
Colored lines indicate the task’s current position on the schedule.
To see or print a Baseline alone, toggle the Comparison to the Off position.

Email a Baseline
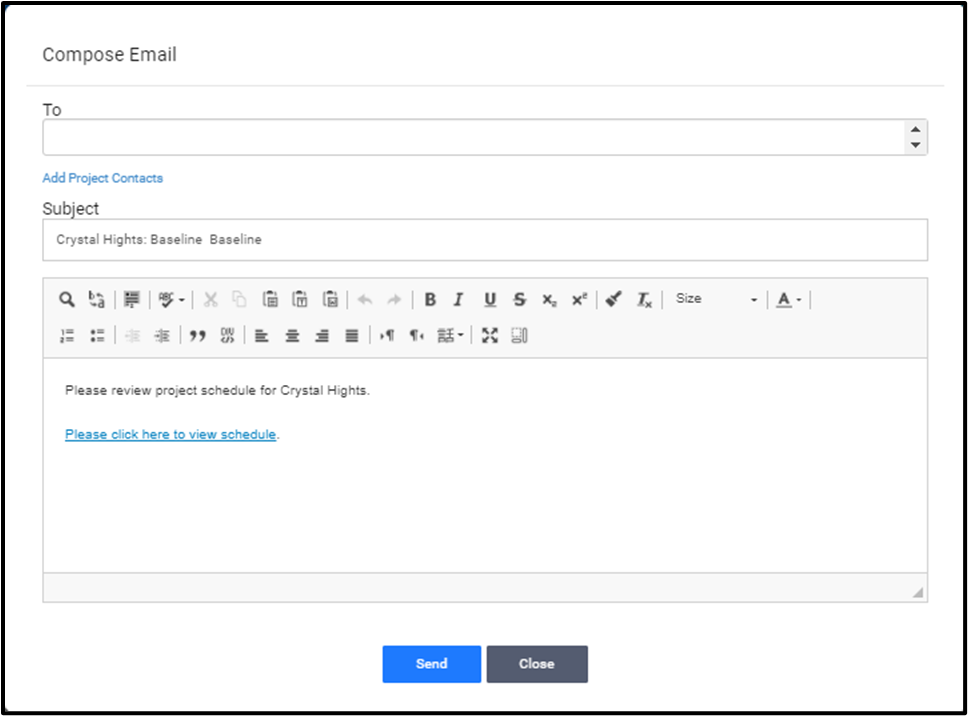
To send an email with an interactive Baseline Schedule link, click Email Baseline.

Start to type a contact name in the To cell and select or add all project contacts and send.

Clicking the link in the email will open an informational view of the schedule. Recipients can open windows to view additional Task information like dependencies and resources that are not typically available with PDF print versions.
Users can Print a PDF schedule in the upper left corner.
No login is required.

How Do I Save, File And Send A Schedule
To send an interactive schedule
To Email a link to an interactive copy of the current schedule, save a copy as a Baseline from the schedule screen by clicking Add as Baseline.

Click on the Baseline tab
Then click on Email Baseline

An email form opens allowing you to send a link to the recipients allowing them to open a detailed schedule.
No login is required
To save a copy of the schedule and send
To save a copy of a schedule that can be sent in PDF
Use the +/- icons to select the day, week, or month view of the schedule.

Click print to open the print window. Select the desired options and layouts. Then save.
To send a copy of the PDF go to the baseline then uploaded schedules
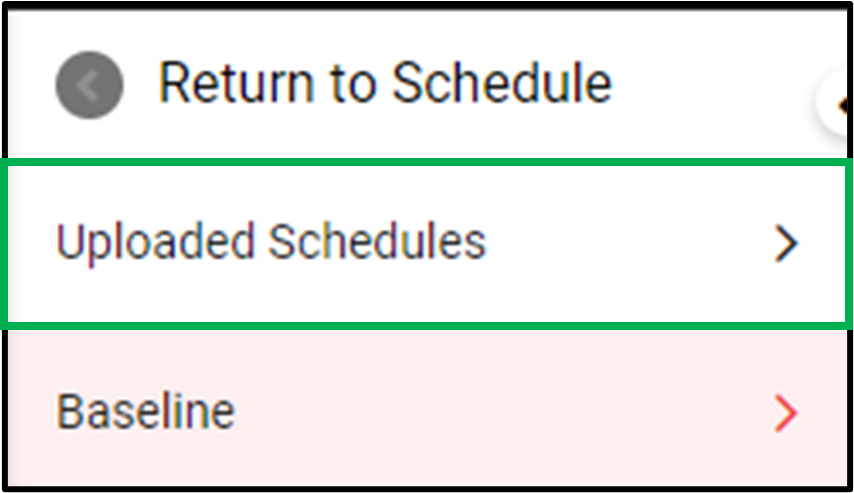
Then click send.

How Do I Edit The Schedule?
Editing a schedule is very similar to what is done when creating a schedule.
To manually link tasks, click the finish bubble and drag it to the start bubble of the preceding activity.
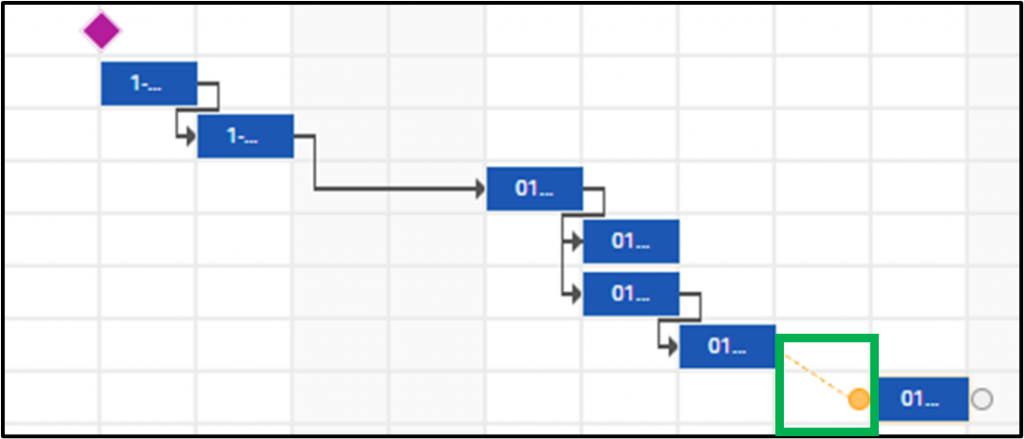
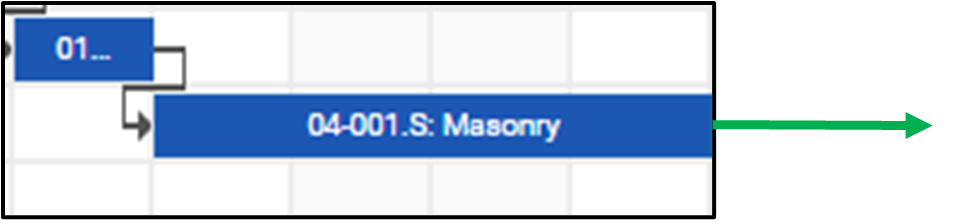
Drag the Gantt bar to the right to establish the task duration.
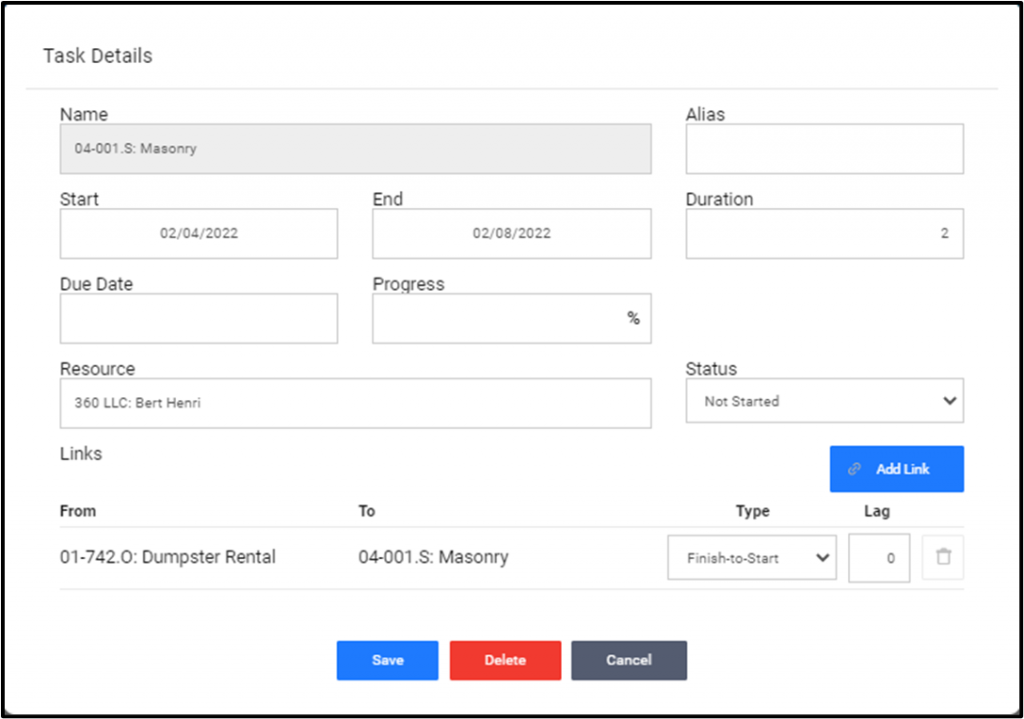
Double click on the Gantt bar to open the task details screen, or click the task item on the left column to open the task details screen.
From the task details enter the task start/end date as well as duration, resource, and status.
Add Links to dependent and preceding activities, select the relationship, and add lag time (positive or negative).
Once a relationship is established and needs to be edited or deleted, double click the taskbar to open the task details window. Click the trash can icon to remove the relationship link, and then save.
Toggle to full screen for more workspace.

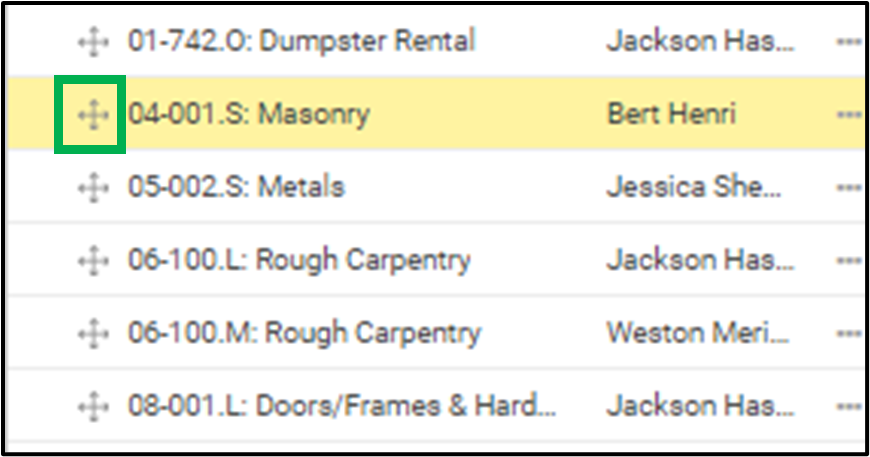
Use the drag and drop icon next to the task on the left hand column to move task location up or down to arrange in the desired order.
The zoom in and out icons change the scale from day, week, and month view.

Click the “Link In Sequence” to link all activities between the project start task and substantial completion task in a finish to start relationship and show activities in the critical path.

Click “Remove All Links” to unlink the sequence.

“Print” will create the PDF of the current view on-screen view. The schedule will automatically print for the full date range of the project. Update the date range to print look-ahead schedules.

How Do I Create A Schedule?
To add a schedule, Click on Daily activity > schedules

If you choose to Create a Schedule, choose options for Existing Templates and Cost Codes, Then confirm the Schedule start date.

The schedule page will open for you to begin building the project schedule.

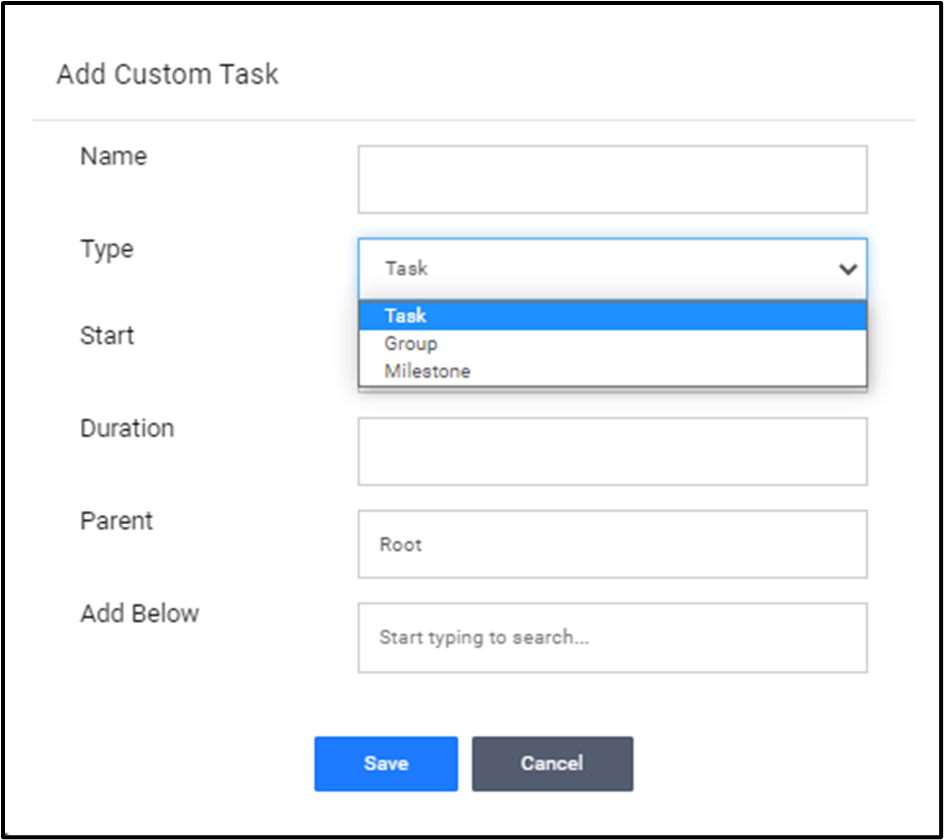
From the schedule uses can ADD:
- Cost codes
- Custom tasks
- Groups
- Milestones

Manipulate Tasks and link on Gantt Chart
To manually link tasks, click the finish bubble and drag it to the start bubble of the preceding activity.

Drag the Gantt bar to the right to establish task duration.

Double click on the Gannt Bar to open the task details screen, or click the task item on the left column to open the task details screen
From the task details enter the task start and end dates as well as the duration, resources, and status.
Add links to dependent and preceding activities, select the relationship, add lag time (positive or negative)
Once a relationship is established and needs to be edited or deleted, double click the taskbar to open the task details window. Click the trash can icon to remove the relationship link, and then save.

Toggle to full screen for more workspace

Use the drag/drop icon next to the task on left column to move task locations up or down to arrange in order.

Zoom in and out changes the scale from day, week, and month views. Change here before you print to change the schedule view on PDF.

Click “link in sequence” to link all activities between the project start task and substantial completion task in a finish to start relationship and show activities in the critical path.
Note: do not use link in sequence if you already have other custom links or dates established or those will be replaced.

Click “remove all links” to unlink the sequence

Print will create the PDF of the current view on-screen view. The schedule will automatically print for the full date range of the project. Update the date range to print look-ahead schedules.
