- Home
- Upcoming Live Training Sessions!!
- Webinar Recordings
- Implementation Courses
- Getting Started Guide For Admins
- RedTeam Go Navigation
- Gear Icon
- Administration
- Contacts
- Projects
- Planroom
- Estimate (Base Bid)
- Bid Invitations
- Proposal Package
- Construction Buy Out
- Contracts
- Daily Logs
- Photos
- Billing
- Schedules
- Submittals
- Transmittals
- Request For Information (RFI)
- Potential Change Orders (PCOs)
- Change Orders
- Owner Change Orders
- Subcontractor Change Orders
- Internal Change Orders
- Meetings
- How Do I Add Meetings?
- Close Out
- Job Costs (Purchase Orders & Expenses)
- Required Documents
- Accounting
- Reports
- Superintendent
- Subcontractor
- Architect
- Owner
- Mobile
- Release Notes
- Glossary of Terms
- Accounting
Hello. How can we help you?
How do I upload new Versions or Revisions to the Planroom?
All Revised files are added via the + Upload Button. The method is different if you are Splitting and Scanning with the OCR or just uploading files without scanning. Both methods appear below.
With Splitting and Scanning
- Go to Planroom>Drawing
- Click +Upload and Select the option Upload File(s) for Splitting, Scanning and Linking

On the Upload and Scan screen select the Folder that contains the Plan Set from the Drop Down.
NOTE * You must select an existing the folder or the revision process will not be activated!

There are three options for identifying Versions/Revisions.
- You can enter a Version name or number to apply to all sheets here on Upload
- You can leave cell blank and use the OCR scanning process to identify the Version/Revisions.
- You will be able to manually type version information during the Review and Matching process.
Complete the other cells on form and click Upload Files button to begin scanning process.

The system will Upload the revised files through the same process as the originals and place the file in the Progress Log for OCR selection and then into Review after Scanning is complete.
Reviewing Scanned Versions/Revisions.
When you go to Progress Log and click to Review the new version system will attempt to match the Old and New version files by the Sheet number.
- Click on the Sheet to display and compare the old and new data for accuracy.

- Make any needed corrections to the new Version and click Approve by sheet or by using check boxes on left to bulk approve the sheets.
- If sheets are matched incorrectly click after Pick the wrong drawing? Click Here
- This will unmatch the sheet so you can reselect or leave it in the Unmatched section if it should be added to the existing folder as a new sheet, rather than a revision.

- Any sheets that could not be matched or are new will show in the Unmatched Sheet section
- Click to open these and Match to a previous version if needed.

If you have Approved a sheet in error, select the sheet and click on Cancel in lower right so sheet becomes editable again.

After all Matched and Unmatched sheets are Approved, click Publish in upper right hand corner to post the new Version to the Drawing set in Planroom.
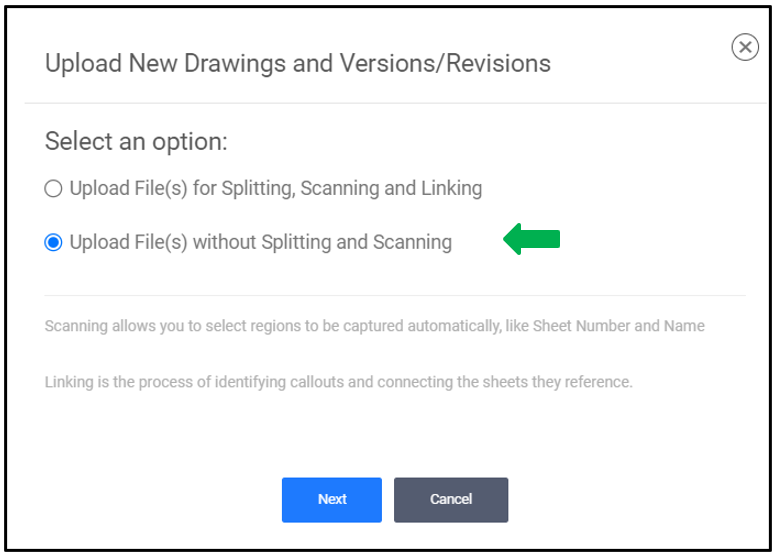
Upload Only (No Splitting and Scanning)
- Go to Planroom>Drawing
- Click +Upload and Select the option Upload File(s) without Splitting and Scanning
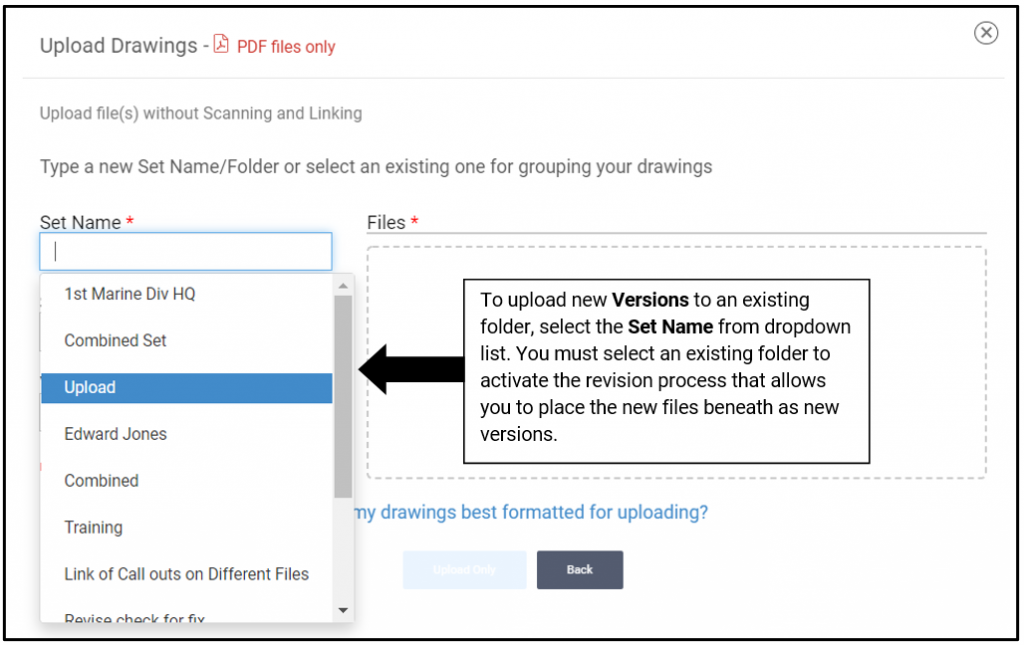
On the Upload screen Select the Folder that contains the Plan Set from the Drop Down.
NOTE * You must select an existing the folder or the revision process will not be activated!
Complete the other cells on form and click Upload Only button to begin file matching.
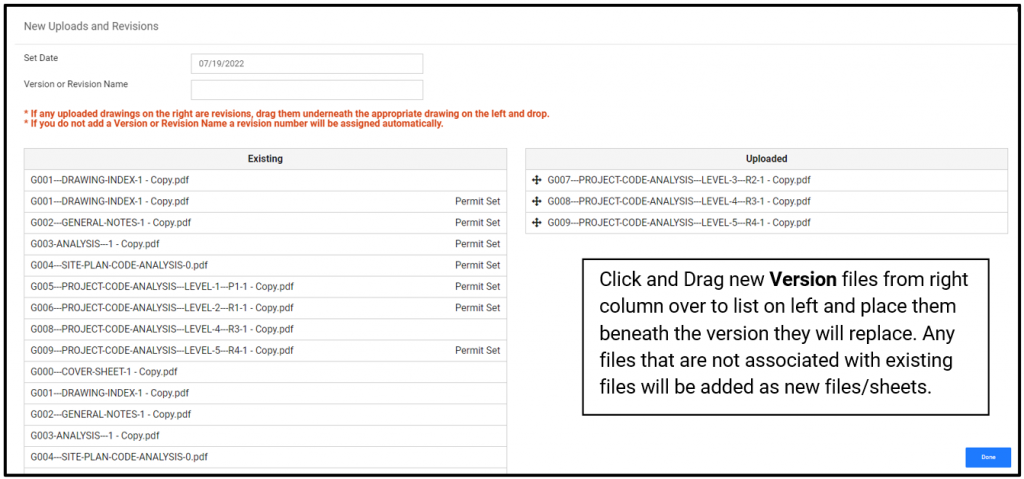
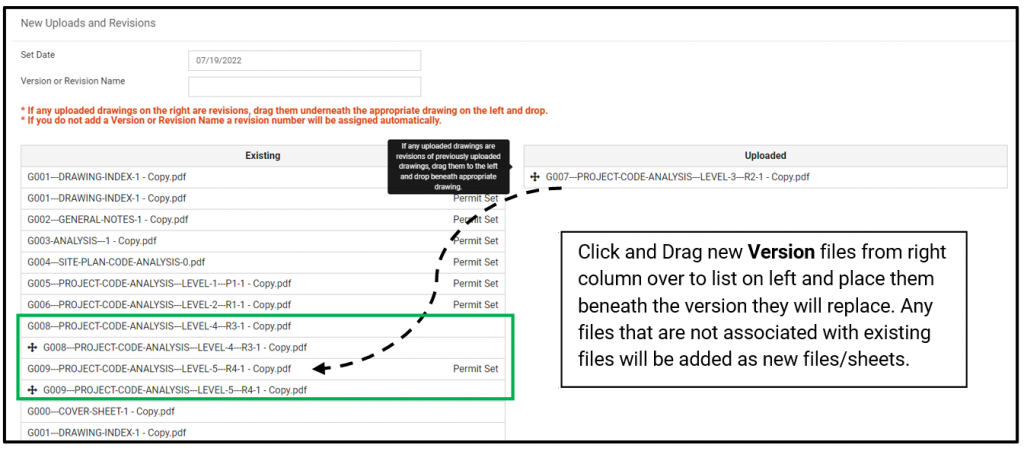
The new Version/Revision matching form will open.
- Click and Drag new Version files from right column over to list on left.
- Position the file directly beneath the file to replace.
- These can be repositioned as needed
- Any files that are not associated with existing files (left on right hand side) will be added as new files/sheets in the existing Drawing Set folder.
- Click Done to commit to the Drawing Set
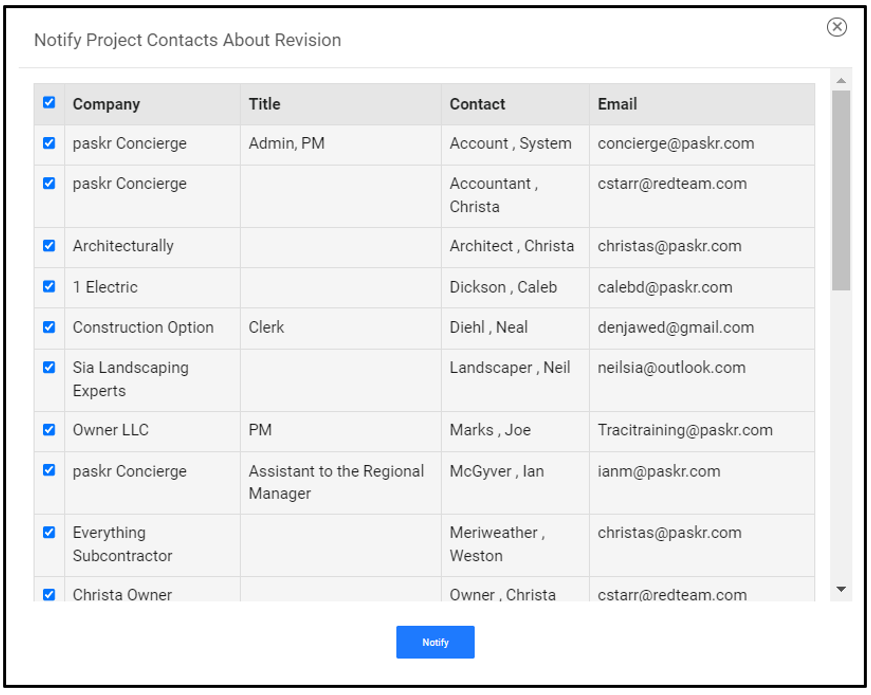
The option to Notify project contacts about the new Versions/Revisions will appear.
Click Notify so send selected Project contacts the email about revised documents.