

- Home
- Upcoming Live Training Sessions!!
- Webinar Recordings
- Implementation Courses
- Getting Started Guide For Admins
- RedTeam Go Navigation
- Gear Icon
- Administration
- Contacts
- Projects
- Planroom
- Estimate (Base Bid)
- Bid Invitations
- Proposal Package
- Construction Buy Out
- Contracts
- Daily Logs
- Photos
- Billing
- Schedules
- Submittals
- Transmittals
- Request For Information (RFI)
- Potential Change Orders (PCOs)
- Change Orders
- Owner Change Orders
- Subcontractor Change Orders
- Internal Change Orders
- Meetings
- How Do I Add Meetings?
- Close Out
- Job Costs (Purchase Orders & Expenses)
- Required Documents
- Accounting
- Reports
- Superintendent
- Subcontractor
- Architect
- Owner
- Mobile
- Release Notes
- Glossary of Terms
- Accounting
Hello. How can we help you?
How Do I Create An Owner Initiated Potential Change Order (PCO)?
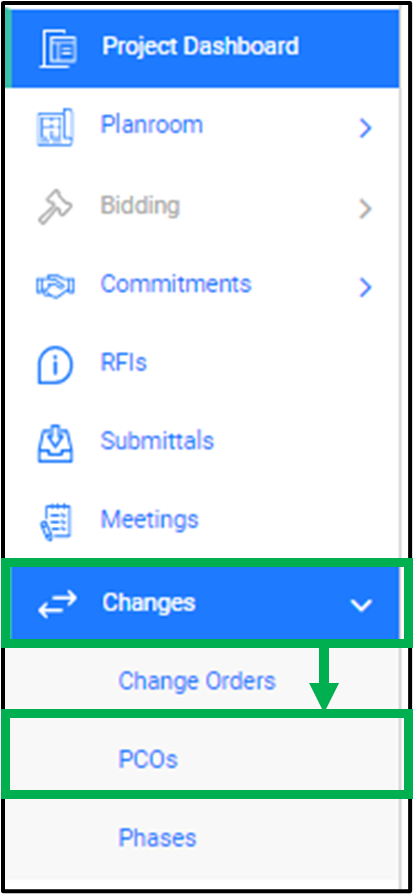
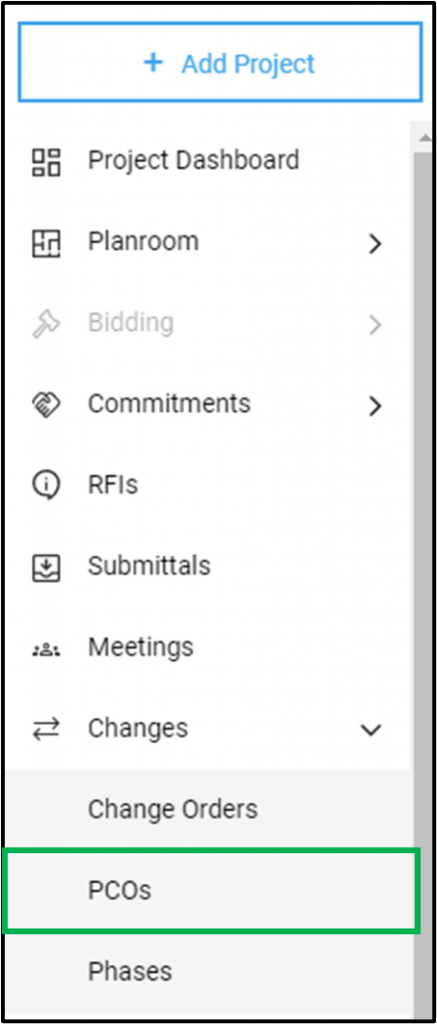
From the Left side menu, click Changes > PCOs
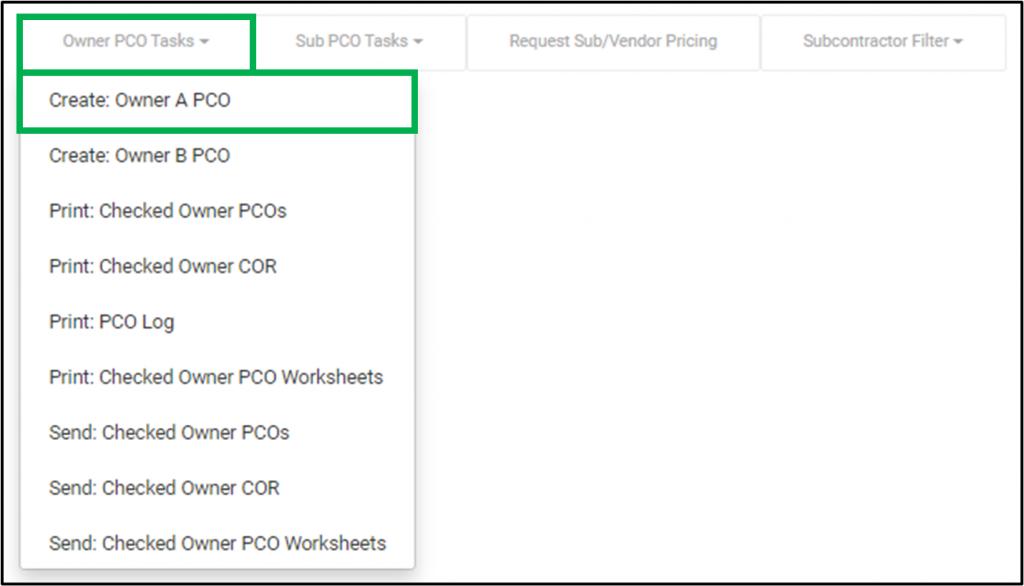
Click on Owner PCO Tasks > Create: Owner A PCO
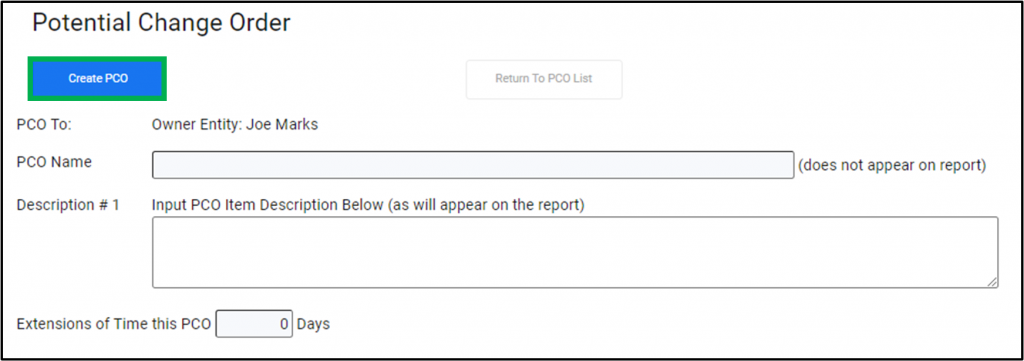
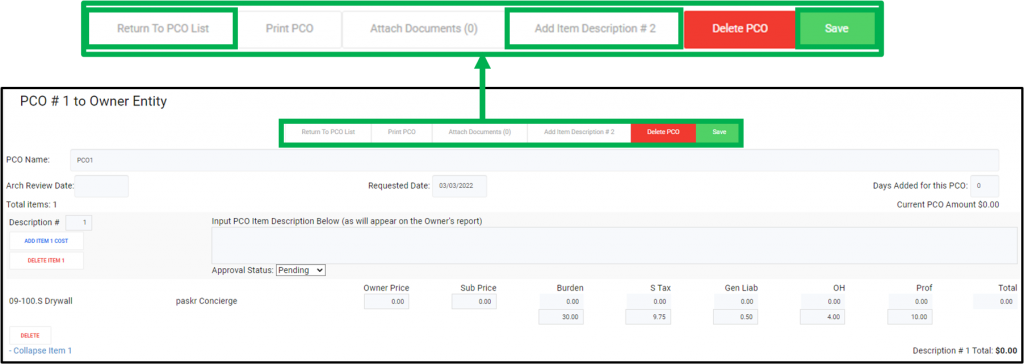
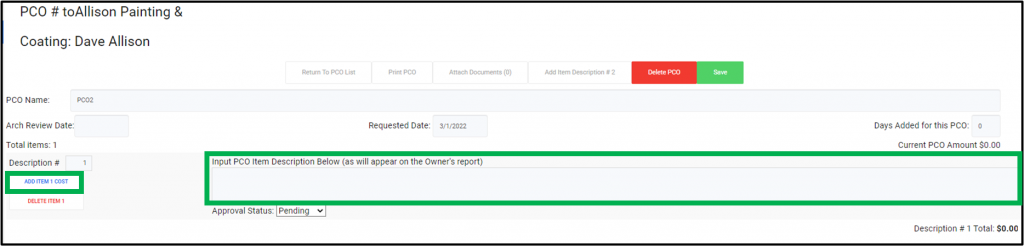
Fill in PCO name and description then Create PCO
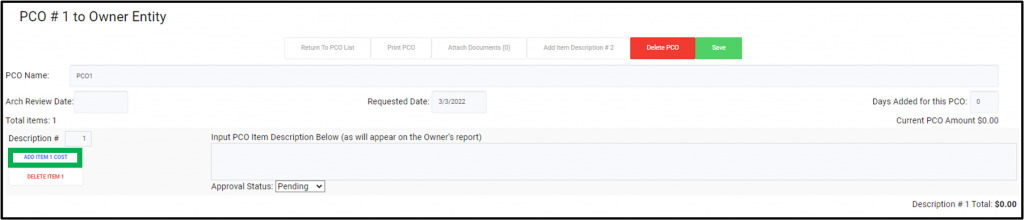
Add Item 1 cost
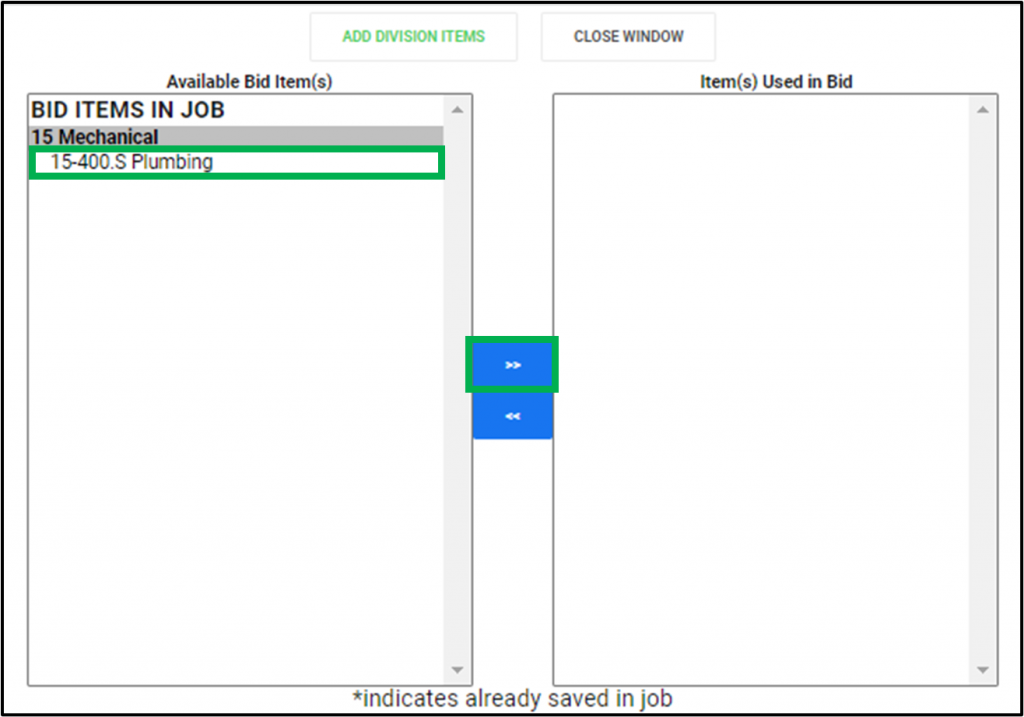
Select the bid item and click the >> to move it to the right.
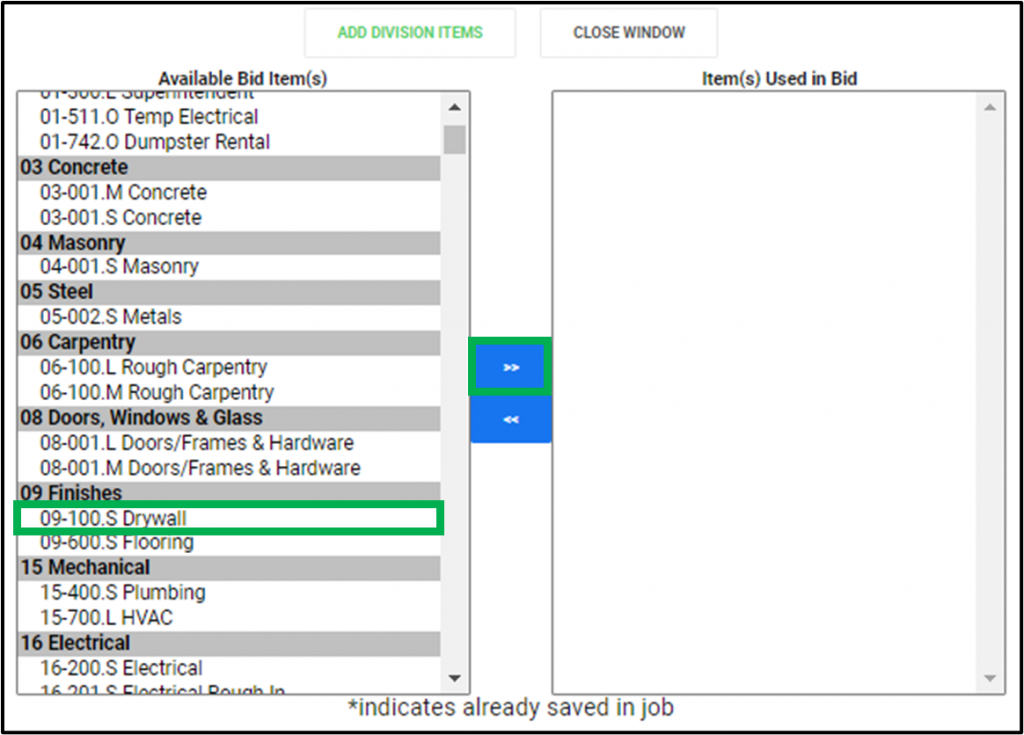
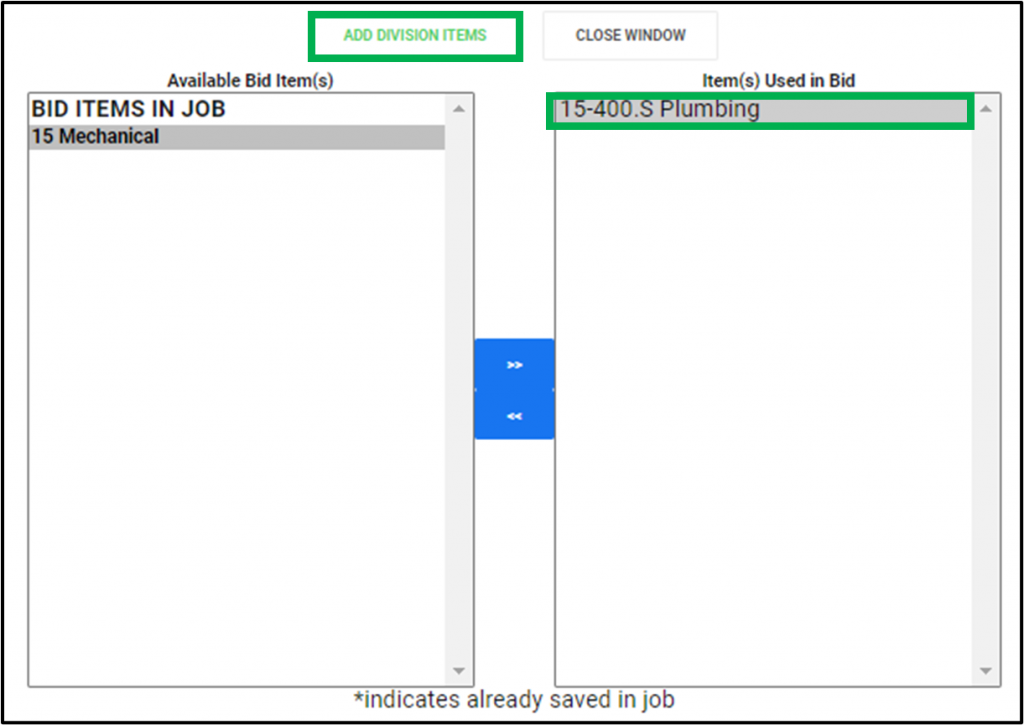
Click on Add Division Items
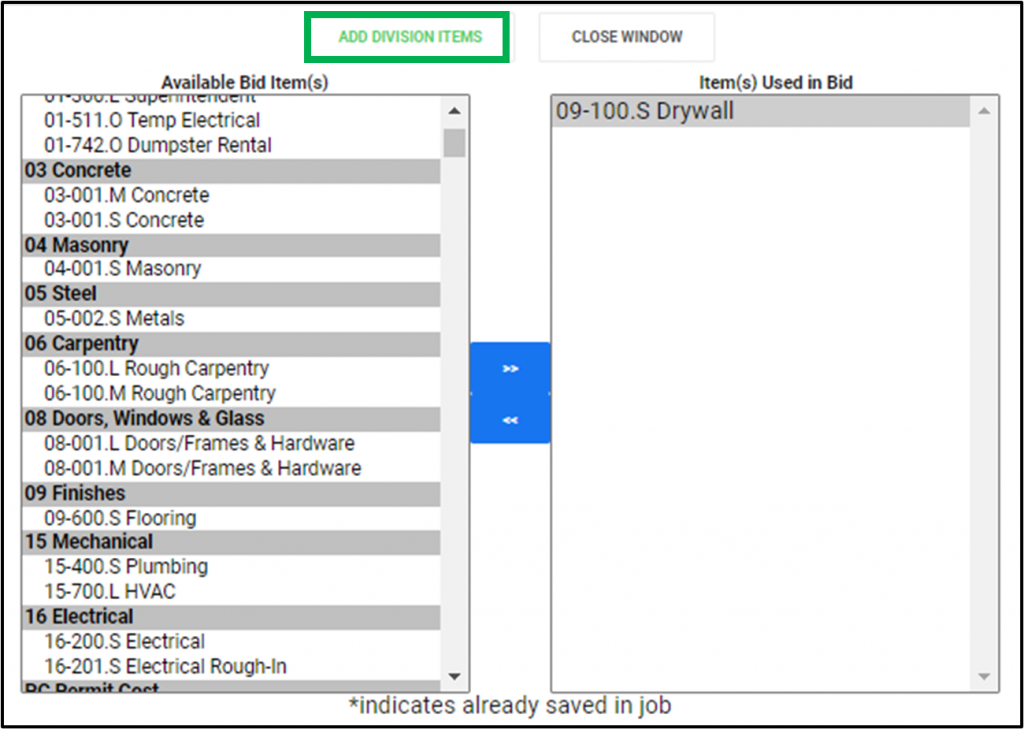
If you need to add more items, click Add Division Item # 2
Click Save and Return to PCO List.
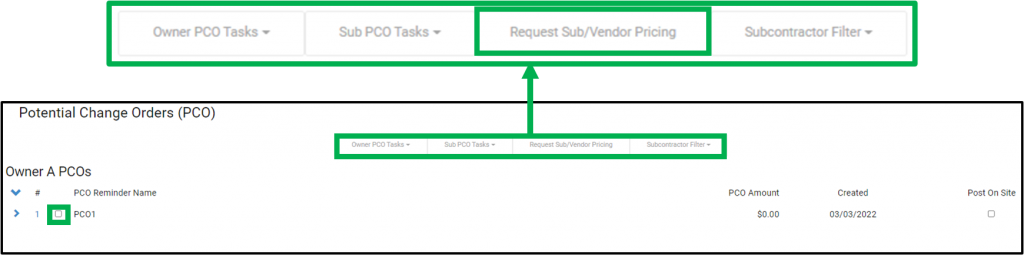
Request Sub / Vendor Pricing
Click the box next to the PCO.
Click on Request Sub / Vendor Pricing.
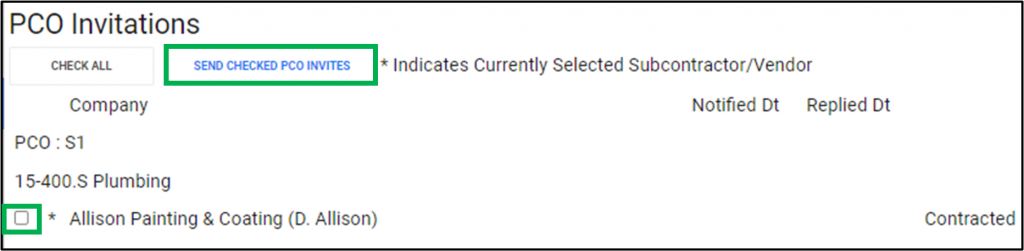
Click on the blue cost item.
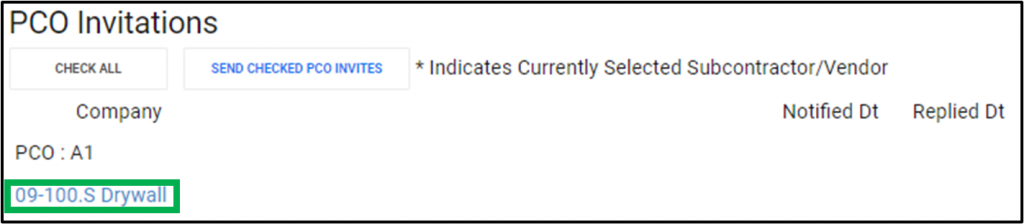
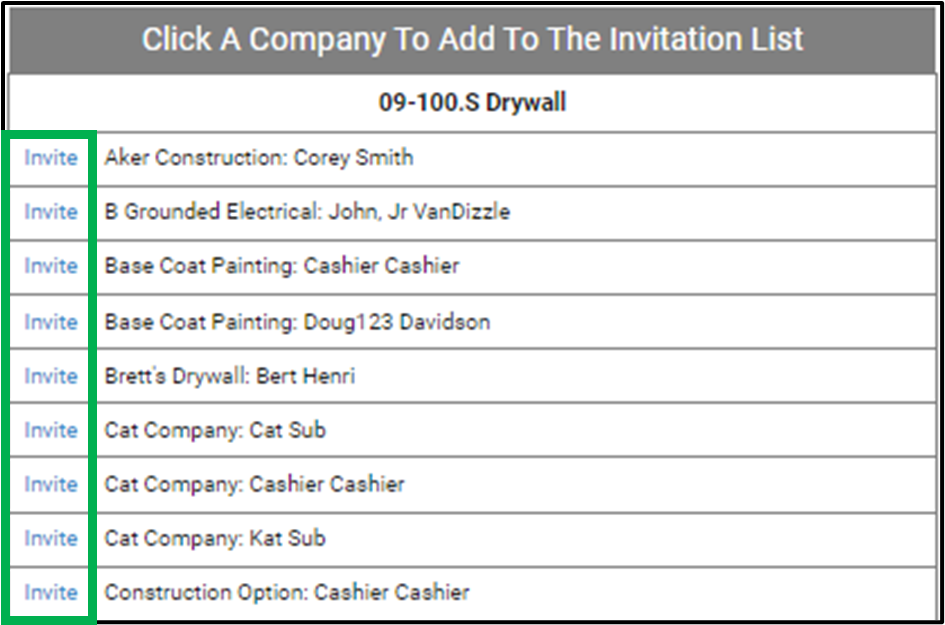
Click Invite next to the Subs you want to invite.
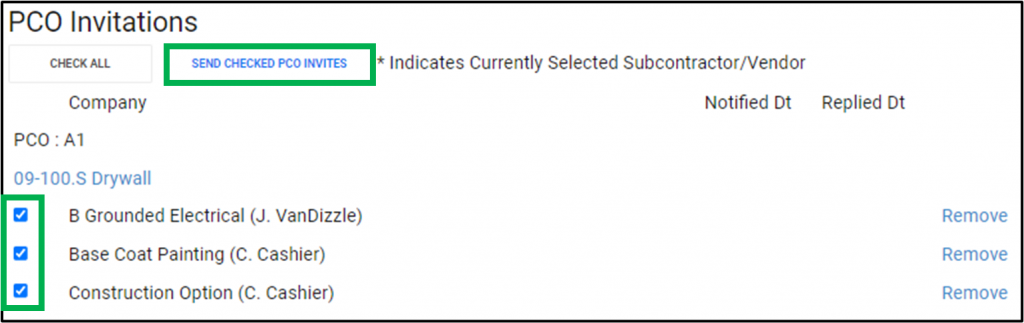
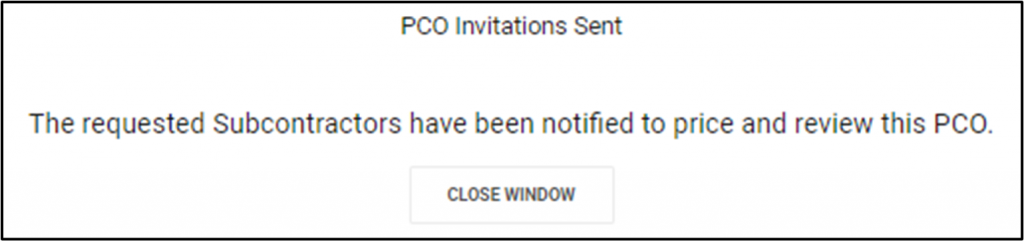
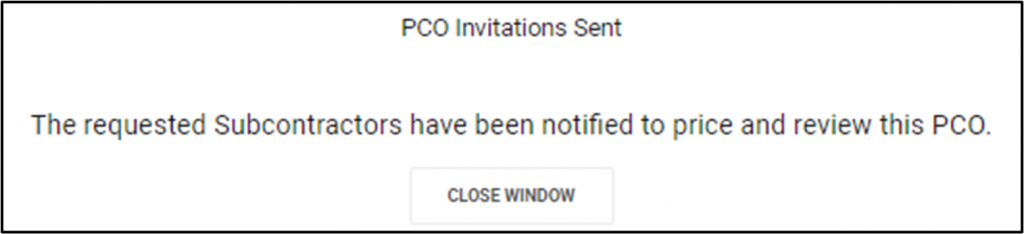
Click Check All and then click on Send Checked PCO Invites.
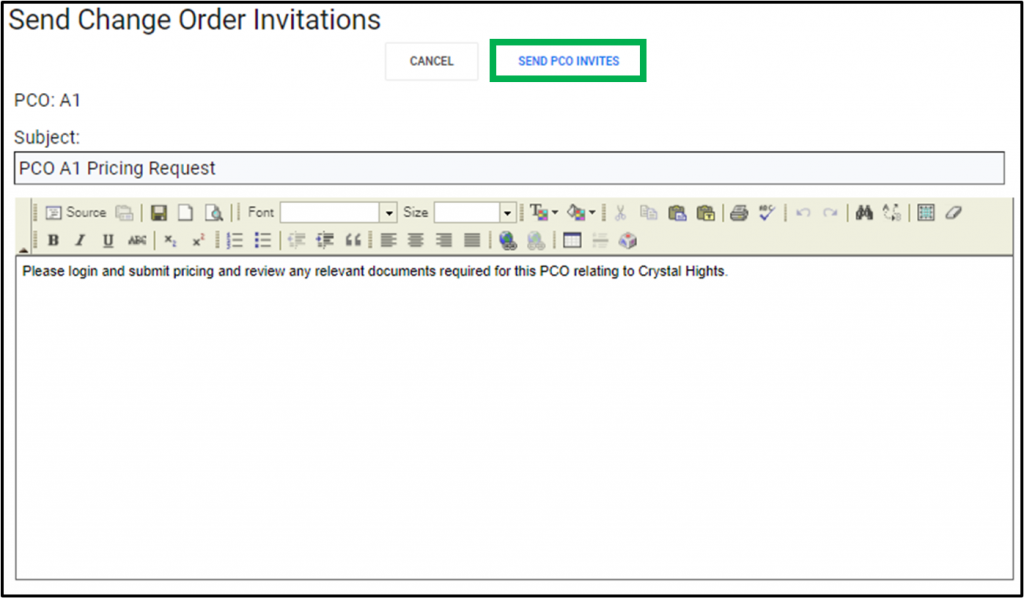
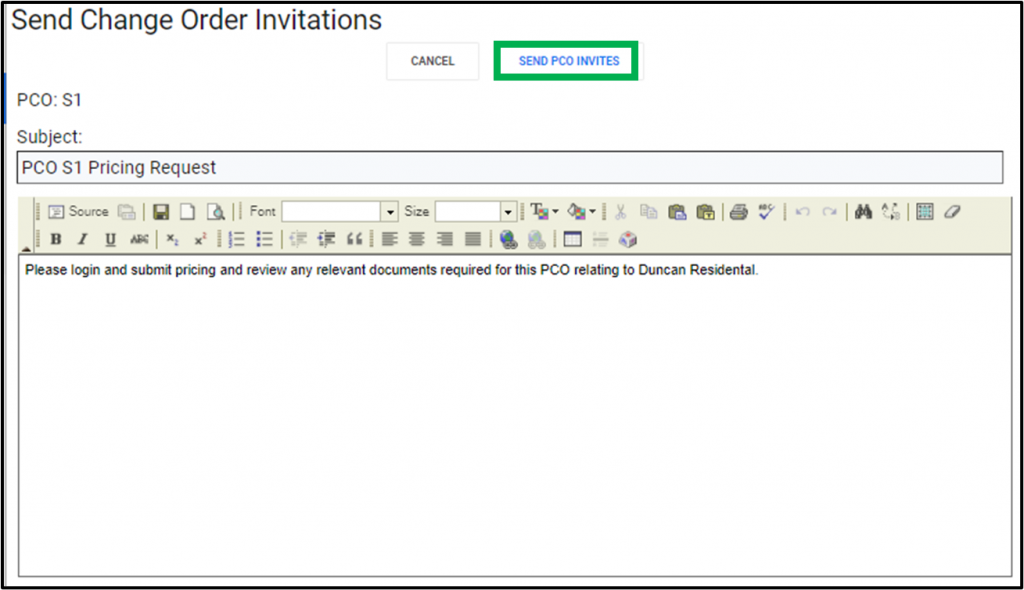
Click on Send PCO invites.
PCO Invitations Sent. Close window.
After Sub /Vendor Pricing has been Submitted
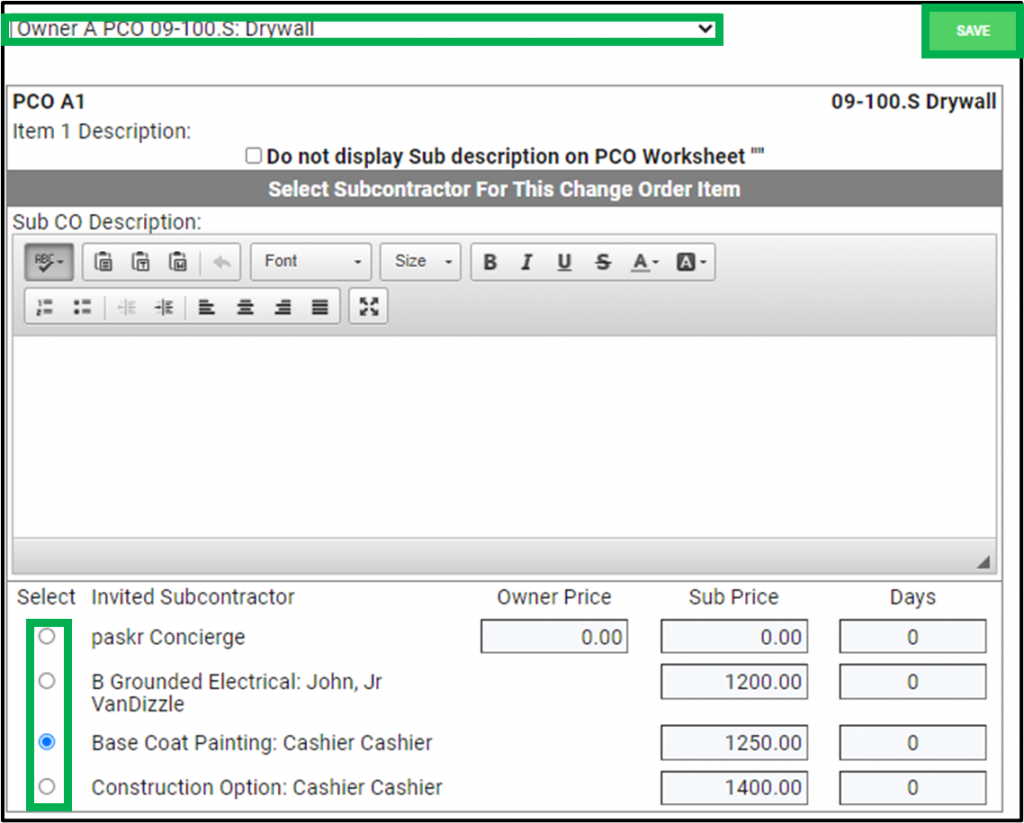
To view the Sub /Vendor Pricing, Click the Blue down arrow. Then click the Blue dollar amount.

Select PCO item from the drop-down menu.
Select the Circle to the left of the Subcontractor to be used and click Save.
To Incorporate Sub / Vendor Pricing in the Owner PCO, Click the Blue down arrow and Click Export $ to include it in the Owner PCO.

Select Subcontractor is now shown and price is exported.
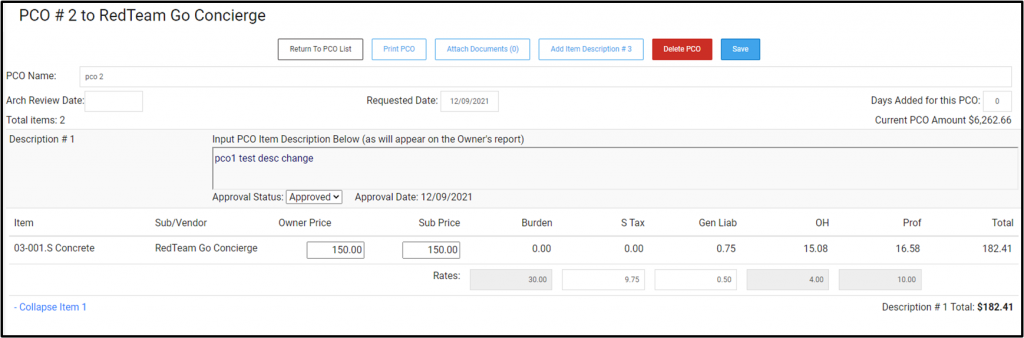
To add GC costs, input pricing for subs and vendors, or adjust the price to Owner, click on the Blue PCO number and make desired adjustments then save

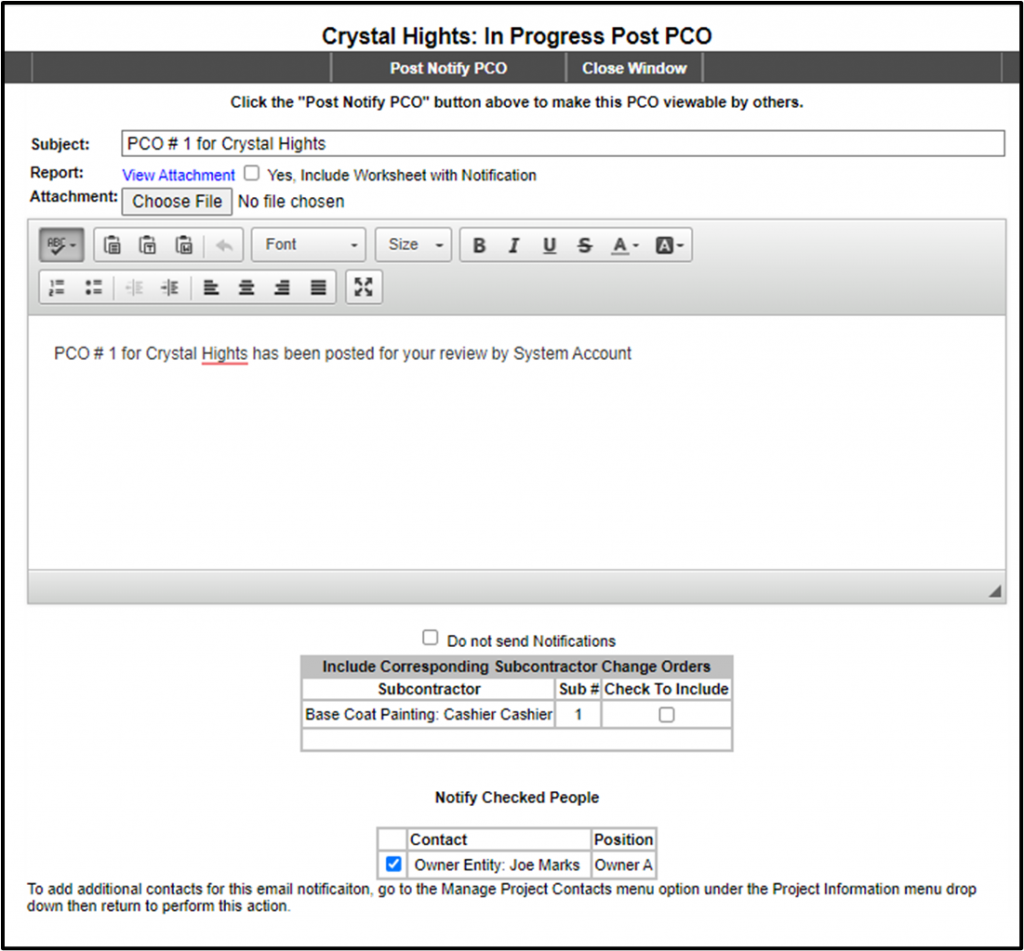
Post on Site
Click on the check box below Post on site

Post Notify PCO email opens Click Post Notify PCO.
The Owner and Architect will receive an email notification and can log in to approve or reject the PCO.
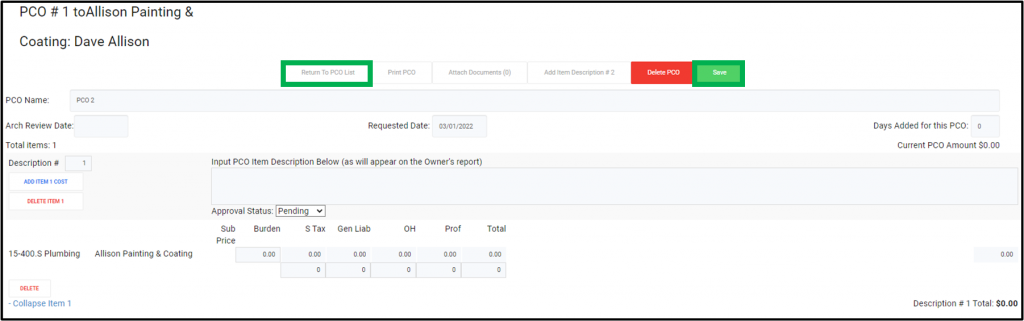
How Do I Create A Subcontractor / Vendor Only PCO (Potential Change Order)?
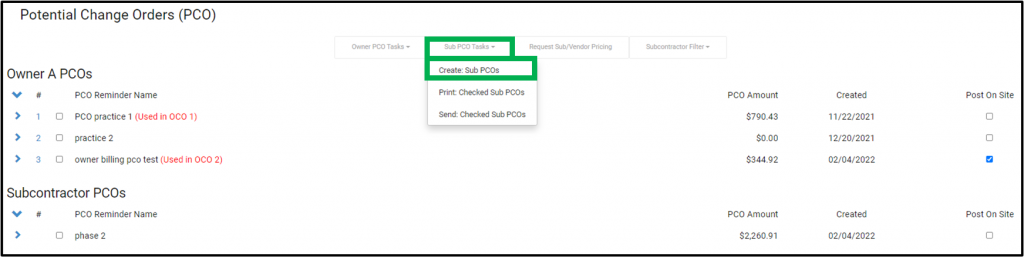
From the left side menu, click on Changes > PCOs.

Select Sub PCO tasks then Create: Sub PCOs
The Potential Change Order screen will open.
Select the GC’s company as the Subcontractor for the PCO To.
Enter the PCO Name. (This name will not appear on the PCO report)
Enter the number of days if there is an extension of time that needs to be added to perform the work.
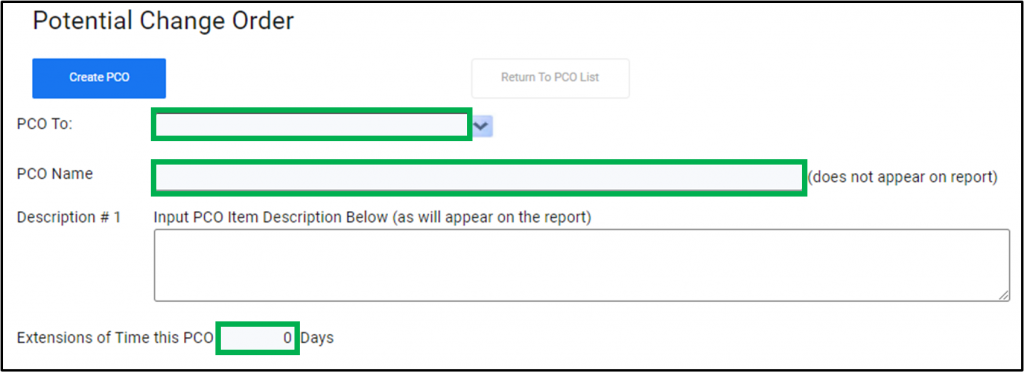
Input the PCO Item Description
Click on Add Item Cost.
Select the Bid Item and click the >> to move it to the right.
Click on Add Division Items.
Click Save
Click Return to PCO List.
Check the box next to the PCO.
Click on Request Sub / Vendor Pricing.
Check the box next to the Sub / Vendor
Then click Send Checked PCO Invites
PCO invite window opens click Send PCO invites.
PCO invitations sent window opens. Close window.
How Do I View A PCO?
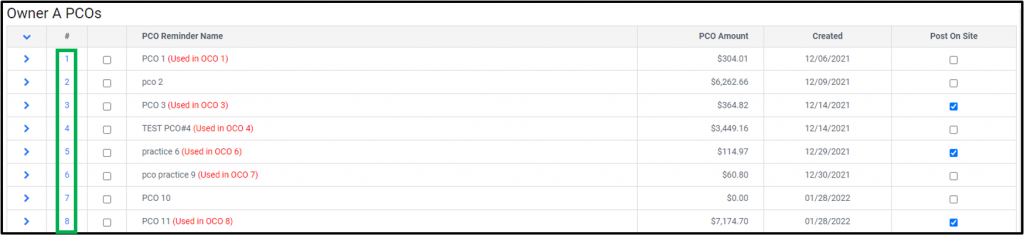
Navigate to Changes, then PCOs.
Then click on the number to open the PCO.
Why Create A Potential Change Order (PCO) Before A Change Order
With Potential Change Order (PCO) you can create an “wish list” of items that can be pulled into the project via a change order. The process is started with a PCO because when a change order is created, all change orders have to be APPROVED in order since they affect the contract amount. Therefore, by starting with a PCO, the pricing is presented to the Owner, the Owner can approve / reject each item proposed in the PCO and the approved items can be pulled into a change order with one click. By having the PCO approved first, the change order process is not held up because you already have approval.