

- Home
- Upcoming Live Training Sessions!!
- Webinar Recordings
- Implementation Courses
- Getting Started Guide For Admins
- RedTeam Go Navigation
- Gear Icon
- Administration
- Contacts
- Projects
- Planroom
- Estimate (Base Bid)
- Bid Invitations
- Proposal Package
- Construction Buy Out
- Contracts
- Daily Logs
- Photos
- Billing
- Schedules
- Submittals
- Transmittals
- Request For Information (RFI)
- Potential Change Orders (PCOs)
- Change Orders
- Owner Change Orders
- Subcontractor Change Orders
- Internal Change Orders
- Meetings
- How Do I Add Meetings?
- Close Out
- Job Costs (Purchase Orders & Expenses)
- Required Documents
- Accounting
- Reports
- Superintendent
- Subcontractor
- Architect
- Owner
- Mobile
- Release Notes
- Glossary of Terms
- Accounting
Hello. How can we help you?
Can I Add RFIs Without Sending Notifications?
Yes. You can add Requests for Information (RFIs) or Answers without sending notifications. To turn OFF notifications for a project, switch the Notification Toggle to the Off position and proceed with making your updates.
RFI Notifications will be sent when Notifications On is highlighted in blue.

RFI Notifications will NOT be sent when toggle is switched to blue Off position.

Additional notes about Notifications:
- You can turn notifications on or off at any time from inside the project.
- This will only apply to updates made by the GC, so any RFIs that have previously been sent out will still post notification updates if participants respond to those emails.
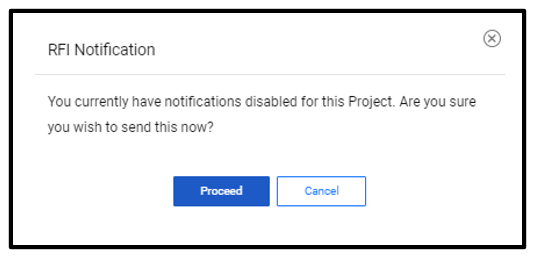
- The GC will still be able to select Save & Submit with RFI when notifications are in the OFF position, but a confirmation message will ask to acknowledge that you DO wish to override and send the notification out at that time.
Why Did We Add This Feature?
While the automatic RFI email notifications are an excellent way to guarantee that all parties see RFI updates in real time, there were a few scenarios where users prefer to have the option to turn these off.
- This enables new RedTeam Go clients to enter existing project RFIs and list the parties that were involved as CCs without sending notifications to the contacts about already resolved RFIs.
- This allows GCs to keep a record of RFIs documented inside the RedTeam Go project, even if an Owner or Architect wants to complete RFIs outside of RedTeam Go.
How Do I Answer An RFI?
When an RFI is sent out, the recipient will receive an e-mail that includes a CLICK HERE link that will be used to capture the answer.
The RFI report and any Attachments will be included.
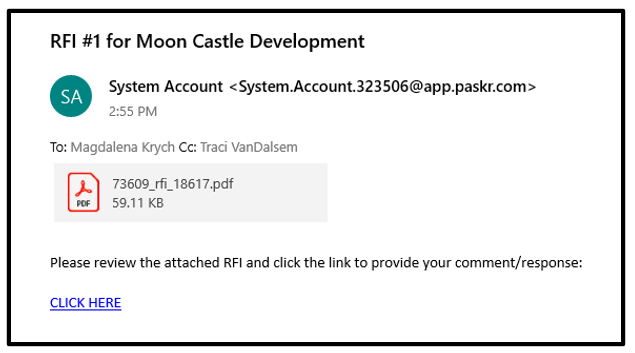
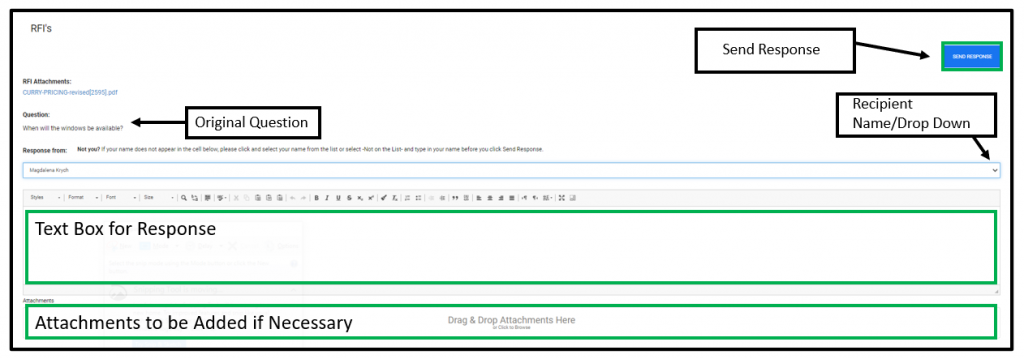
The CLICK HERE link will open the Answer/Respond screen below. Recipient can:
1. Enter answer in the text box.
2. Upload attachments.
3. Select their name from the list (or select ‘Not on the List’ from toggle and type their name into provided name cell.)
4. Click Send Response to submit to GC.
How Can I Sort Or Print RFIs?
From the RFI List Screen you can:
Sort RFIs with the filters on the left-hand side of the RFI screen.


How Do I Create An RFI?
To create an RFI, click on RFIs on the left navigation menu and select to Add RFI.


Add RFI Form Cells
- Subject – RFI Name
- RFI Date – Date RFI is created
- Due Date – Date Response is Required
- Question – Text area for question
- Submitted By – Party that creates RFI
- Answerer -Party to Answer RFI. If the intended recipient does not appear in list, add them to the Project Information Page
- Affects Cost – Select Yes or No. Defaults to No selection
- Affects Schedule – Select Yes or No. Defaults to No selection
- Bidding RFI – Selecting Yes will identify this as a Bidding RFI next the RFI number and on the reports
- Specification – Select from Planroom or free type
- Drawing – Select from Planroom or free type
- Cost Code – Select from cost code list
- Distribution – To Copy Contacts on the RFI, start typing and the system will suggest matches. If the contact is not yet in your database, the system will prompt you to enter with a Quick Add feature.
- Available Contacts – Contacts that are already a part of the project team. These can be added to Selected Contacts and can add a response to the RFI.
- Attachments – Drag & Drop or Click to Browse for files
- Reminders – Check box to send Automated Reminders 24 hours prior
- Save – Saves any updates to the RFI Form
- Save and Submit – Saves information, then sends the RFI out to recipient and distribution list via e-mail. Answers and Responses are collected via the e-mail link and posted in the View/Manage Answer menu choice.
How Can I View, Edit, Or Manage Answers In RFI?
To view existing RFI’s from the Left-Side menu click RFI’s. Then, from the RFI list, click the Ellipse icon.

Existing RFIs-Click the ellipses next to the RFI to open the menu of tasks.

From the Ellipse Menu, you can Submit, Edit, View/Manage Answers, Delete, add Attachments, or Print the RFI.

Select View/Manage Answers to see Answers and Responses for the RFI.
Answers will appear automatically in the View/Manage Answers section when they are returned. When the answer comes back from the official recipient, it will be marked Answers. Additional comments from other copied parties will be listed as Responses.

GC can:
- View the Answers and Responses
- Add additional Answers (click Gear and select Add Answer)
- Edit Answer or Responses
- Select the name of the respondent if the system could not identify (this may occur if the e-mail address is not in the contact database or if the account is an alias of another e-mail account)
- Select the Final Answer (check box)
- Distribute Answer – When you check an Answer as Final, the system will prompt you to Distribute the Answer to all copied parties.