How does Plan Linking Work?

When you Upload and Split a PDF file, in addition to using the Optical Character Recognition (OCR) to scan and name your files, RedTeam Go will also scan for any callouts in your file. If it recognizes existing sheet numbers in the callouts, it will create a link to direct the user to that page upon clicking the link.

After the Upload and Split process is complete, the drawing files will appear in the Planroom folder you named.

  • Expand the folder and click on the Ellipses (…) next to any file name and select View
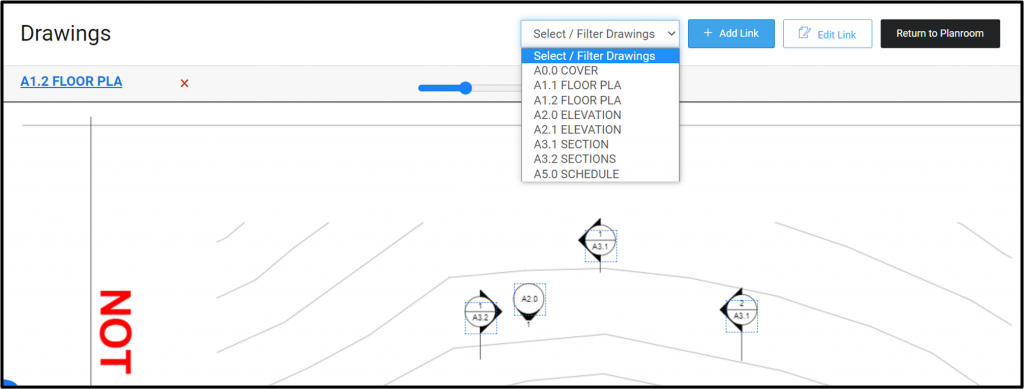
  • This will open the drawing files in the Plan Linking View seen below
  • All page names will appear in the select/filter drawings drop-down.
  • Click on any callout to open and view the linked page.
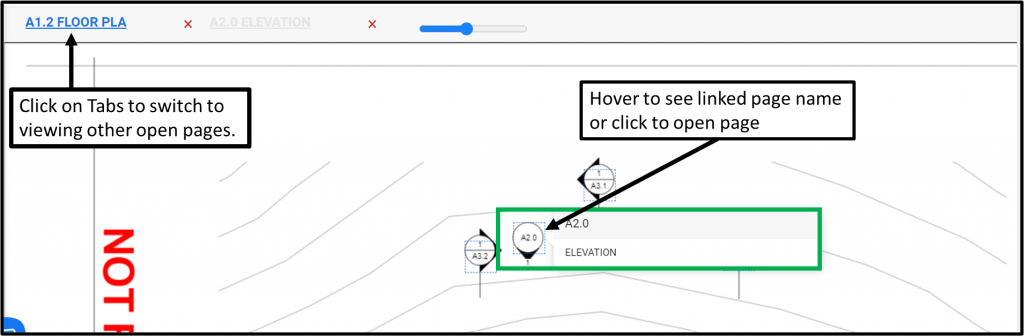
  • Click on the tabs to above the plan view to switch to other open pages.
  • Use the X to close any pages you no longer need to view.

Add Callouts

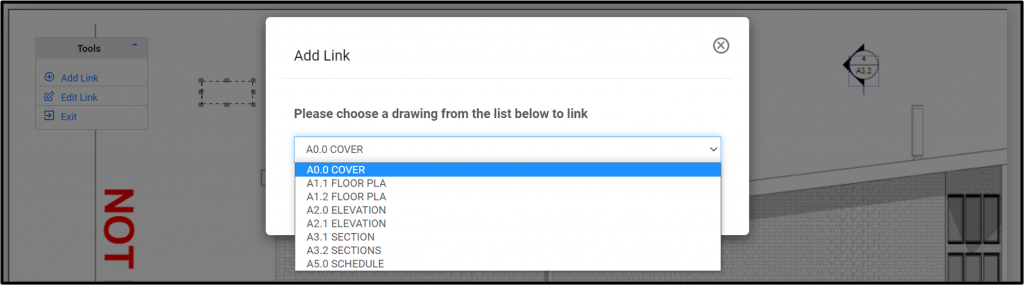
  • If the OCR was unable to read your callout or you wish to link something that is not an official callout click on Add Link
  • Use your mouse to click and drag to select the area you want to link.
  • When the list of drawing sheets opens, select the page you wish to link and click Submit.

Edit Callouts

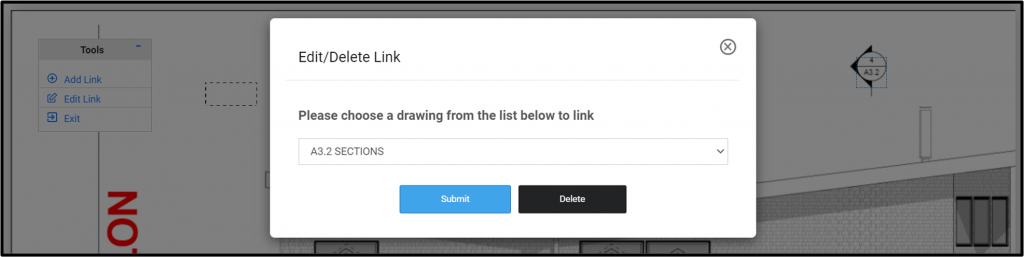
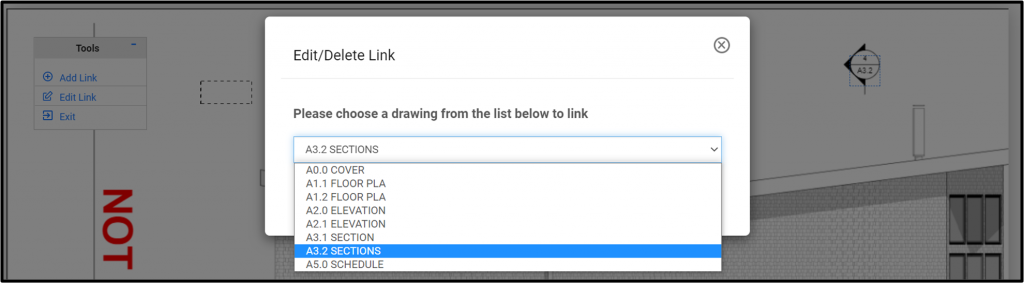
  • If you have a callout that is linking to the wrong page, or you prefer to link elsewhere, click Edit Links
  • When in Edit mode, you can click the existing link and it will open the list of drawing sheets
  • Select the Drawing page your wish to link and click Submit.

Delete Callouts

  • If you wish to remove a callout, click on in Edit Link.
  • When in Edit mode, you can click the existing link and it will open the linked drawing sheet.
  • Click on Delete to completely remove the link.

How Can I Bulk Import my Contact list?

To import your contacts database into RedTeam Go quickly and efficiently, use the Bulk Import Template shown below or arrange your current Excel or .csv file with the same headings as the attached list.

Helpful Hints:

E-mail address – This is the most important piece of information you can include! Without it there is no way to invite your contacts to use RedTeam Go or communicate during the course of your projects! It is much faster to add e-mails to your database before import so it is worth the time to collect prior to import!

Complete information pays off – RedTeam Go will auto populate your contracts and documents with Company names, Contact names and Address information so including this information will issuing contracts quick and easy!

1.) Contacts>Bulk Import Use the provided template to prepare your contact list

  • If you have multiple employees from the same Company, be sure to include the same Company Name on each Employee line so the system will know to nest those employees under the same Company listing.
  • Be sure to include a heading line in Row 1 for easy matching
  • You will be able to add missing information after import

2. Drag and Drop or Browse to locate the contact import

3. RedTeam Go will attempt to match the headings in your Import to the corresponding column in your worksheet.

4. Start on the left to confirm or correct these columns

5. If the top cell description matches the second line click Save and Next and repeat to work across each column

6. If the data match is not correct click on the 2nd line toggle to change.

7. Click Skip if there is no matching column or you need to come back and Edit after releasing a header affiliated with another column.

8. Click Edit to make changes on any column header.

9. Once all Columns are matched or skipped, Finished Matching button will illuminate.

You will see a confirmation for how many contacts imported or failed due to missing information.

10. Click the hyperlink to download the form of Contacts that were not imported. You will also be sent an e-mail of the Failed Contacts Spreadsheet.

Check your Junk and Spam folder if you do not receive the email. It will come from RedTeam Go App with the Subject: RedTeam Go Failed Contact Imports

Click on the Assign Trades button to begin to affiliate Subcontractor and Vendors with their Trades

  • When you come from Import link the page will show Companies (Without Trades) in the first section. You can toggle between all Companies in your contact database and those without any trades by clicking on the word Companies
  • Click on a Company Name to expand the Available Trades and Assigned Trades sections
  • Scroll down the list of Trades or use the search bar to select the Trades from center section and click to assign.
    • Each Trade already has appropriate 16 and 48 Division cost codes assigned to them.
    • Adding these Trades makes it possible to invite subcontractor and Vendors to submit bids on these items and permits you to award Subcontracts on the appropriate cost codes.
  • To Remove a trade, click on the name in the far-right column to remove any trades you do not want assigned.
  • To return to this screen when not using Contact Importer go to Contacts>Assign Trades on the top navigation bar.