

- Home
- Upcoming Live Training Sessions!!
- Webinar Recordings
- Implementation Courses
- Getting Started Guide For Admins
- RedTeam Go Navigation
- Gear Icon
- Administration
- Contacts
- Projects
- Planroom
- Estimate (Base Bid)
- Bid Invitations
- Proposal Package
- Construction Buy Out
- Contracts
- Daily Logs
- Photos
- Billing
- Schedules
- Submittals
- Transmittals
- Request For Information (RFI)
- Potential Change Orders (PCOs)
- Change Orders
- Owner Change Orders
- Subcontractor Change Orders
- Internal Change Orders
- Meetings
- How Do I Add Meetings?
- Close Out
- Job Costs (Purchase Orders & Expenses)
- Required Documents
- Accounting
- Reports
- Superintendent
- Subcontractor
- Architect
- Owner
- Mobile
- Release Notes
- Glossary of Terms
- Accounting
Hello. How can we help you?
How do I work with Project Documents?
Project Documents will be created for all newly created projects. Existing Projects will finish out with the previous Briefcase layout. that permits users to control which parties can view folders in RT Project Documents.
When a project is created, it will pull the current user access settings from Administration. After that, additional changes can be made on the project level. Just like all other Administration defaults, changes made to access defaults in Admin after project creation will not affect existing projects.
Administration
Go to Default Settings>Project Documents Settings
These settings will default to the same access user groups currently have so if they are happy, they do not need to change anything.
Any changes that are made in Administration will only apply to new projects created after those changes are made.
Access to the System Folders where documents are automatically stored/signed/reviewed (Contracts, Change Orders, Billing, Purchase Orders) is only controlled by what the settings were in Administration when projects are created; this is not editable at the project level. This is to provide companies better better protection over that which users can view at the project level.
Gray Checkboxes represent files that cannot be unchecked. These include things like Contracts or Change Orders for Owners and Subcontractors who must sign their documents in the Project Documents via their portal.

The Availability can only be toggled off for Custom Folders and folders that have no automated content in RedTeam Go (such as Permits, Safety Reports, Testing Reports)

Required Documents
Required documents that will be requested on every project can be set at the Administrative level. Additional Project Specific documents can be added after project creation.

Users can now designate if these need to be submitted before a contract will be awarded to them or before Subills can be created with the Require Prior to: radio buttons. Leaving this set to N/A will not prevent the subcontractor from performing any related tasks.

Project Level
Project Documents can be added and permissions for the Custom Folders can be edited by clicking Project Documents from the left hand menu and selecting the desired folders.

Required Documents – Project Level
At the project level, Required Documents from Administration can be edited. New project specific documents can also be added. Requesting the documents from the subcontractors will send a Magic link email so they can submit the requested documents without logging into the subcontractor portal.

If the Prior to Subcontracting option is selected, the GC will not be able to lock the subcontract until the documents are returned. They will see this message appear if they attempt to click the lock checkbox.

Subcontractor Portal View
If the Prior to Sub Billing option is selected, the Subcontractor will not be able to submit a bill until the documents are submitted.
In all cases, the Submit Required Documents box will appear on the Billing page subcontractor task list to prompt them to submit these. Clicking the link directs them to the Required Documents folder.

They can click the document name to see the form or example of the requested item and import their documents to submit to the GC.

How do I navigate RedTeam Go?
Top navigation menu
Dashboard: The Dashboard Icon will return us to the Global dashboard from any page of RedTeam Go.
Project: The Project icon will open a drop-down of recently used projects as well as the ability to access all projects.
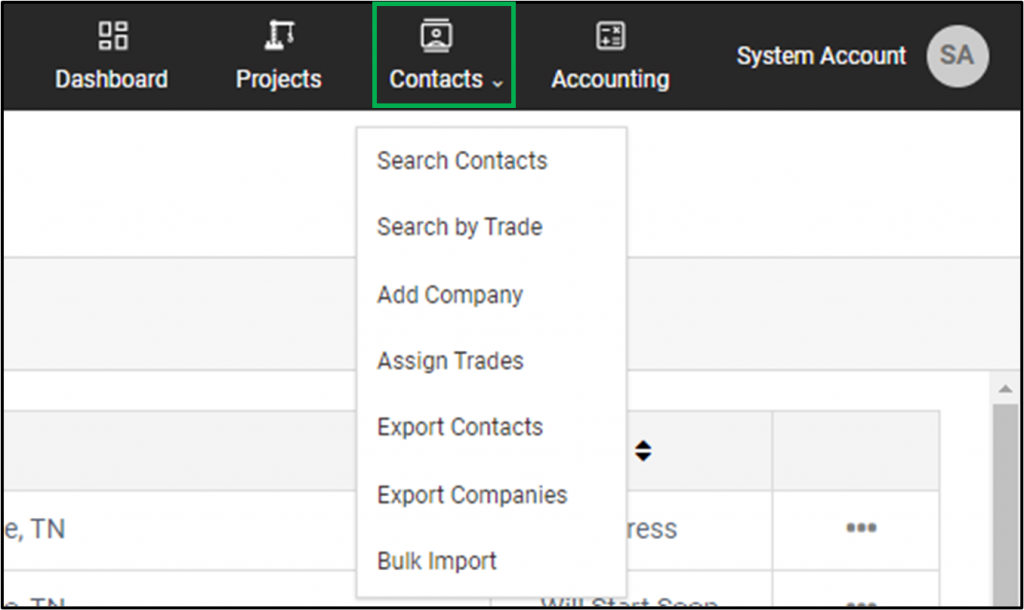
Contacts: The contacts option will open many contacts options.
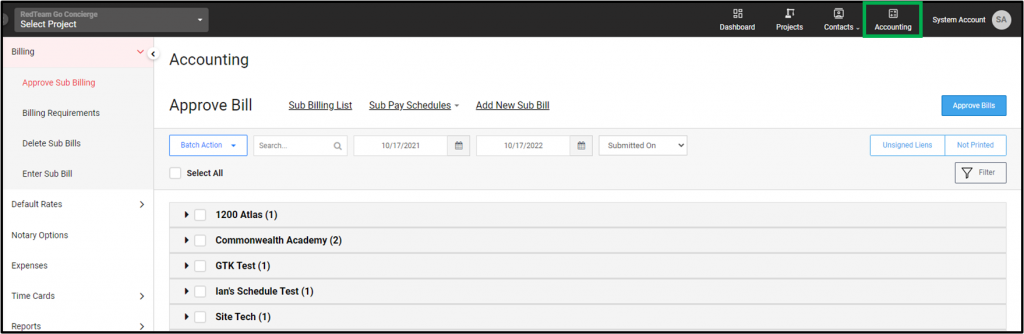
Accounting: The Accounting Icon will take us to the accounting functions in RedTeam Go.
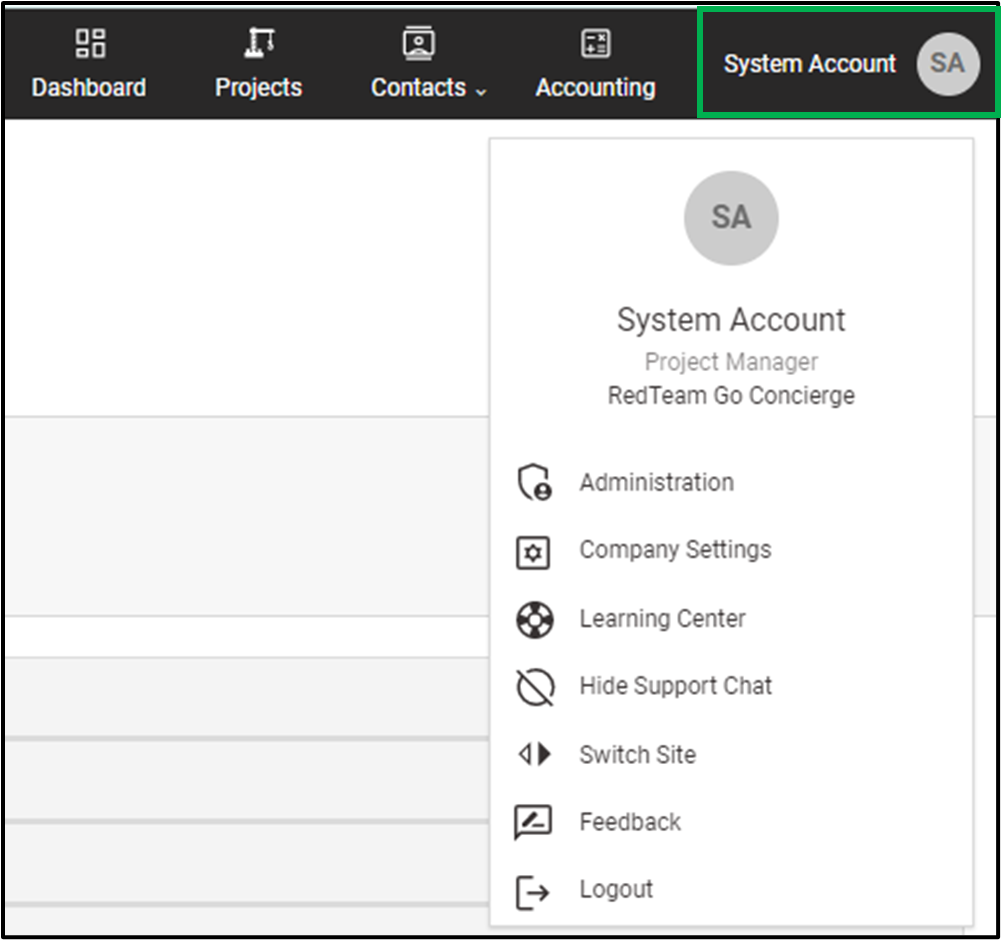
Profile: The profile Icon opens a drop-down where we can access Administration, Company settings as well as the Learning center
Collapsible side navigation
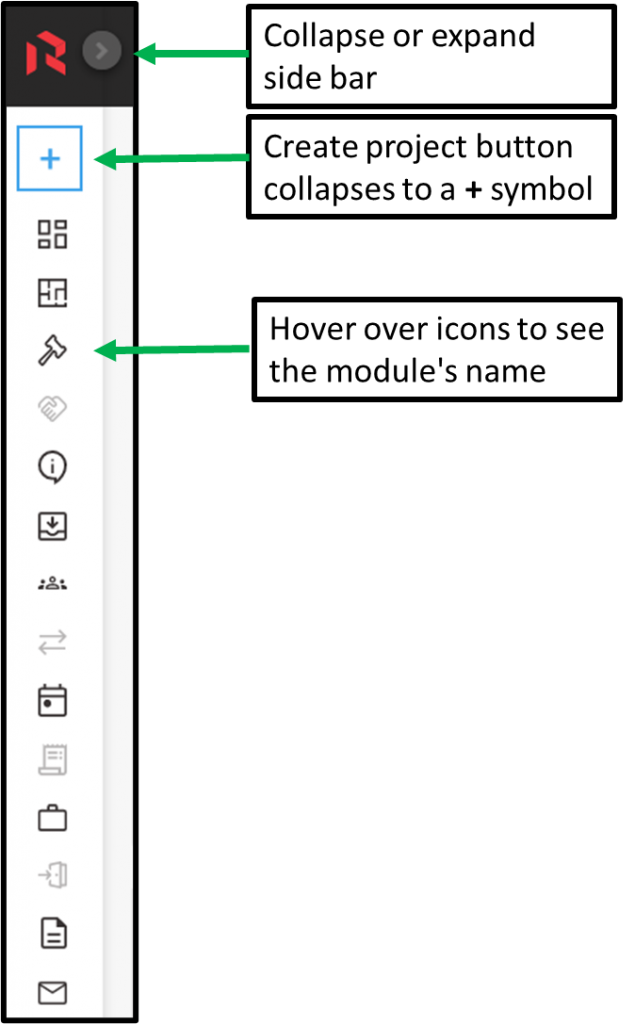
The Left-side Menu can be collapsed to increase the workspace.
Clicking the Plus sign will create a new Project.
Hover over the left-side icons to see the module name
How do I use the Top Navigation Menu?
The Top Navigation bar is home to the Global Dashboard, the Project list, Contacts, Accounting, company settings and the learning center.
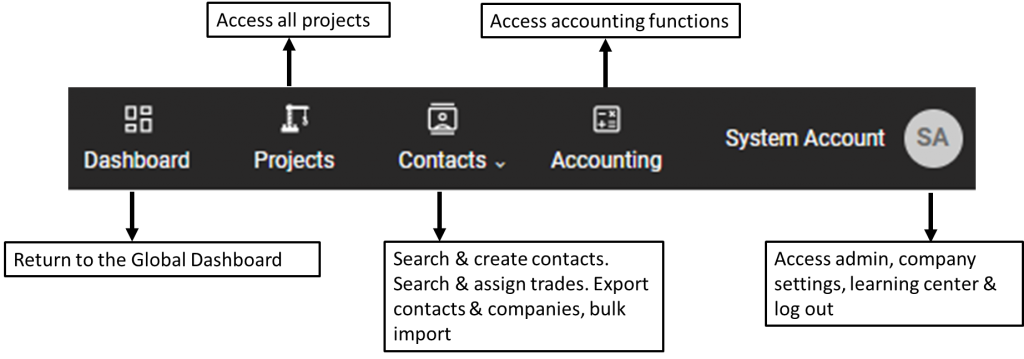
The Dashboard Icon will return us to the Global Dashboard from anywhere in RedTeam Go.
The Project Icon takes us to an alphabetical list of the projects.

The Contacts icon allows us to search by contracts or trades as well as assign trades, and export contacts.
The Accounting icon takes us to the accounting options in RedTeam Go. Clicking on the Accounting icon will open a new Left-side menu with all the accounting features.
The Profile icon contains Administration, Company settings, as well as the Learning Center.
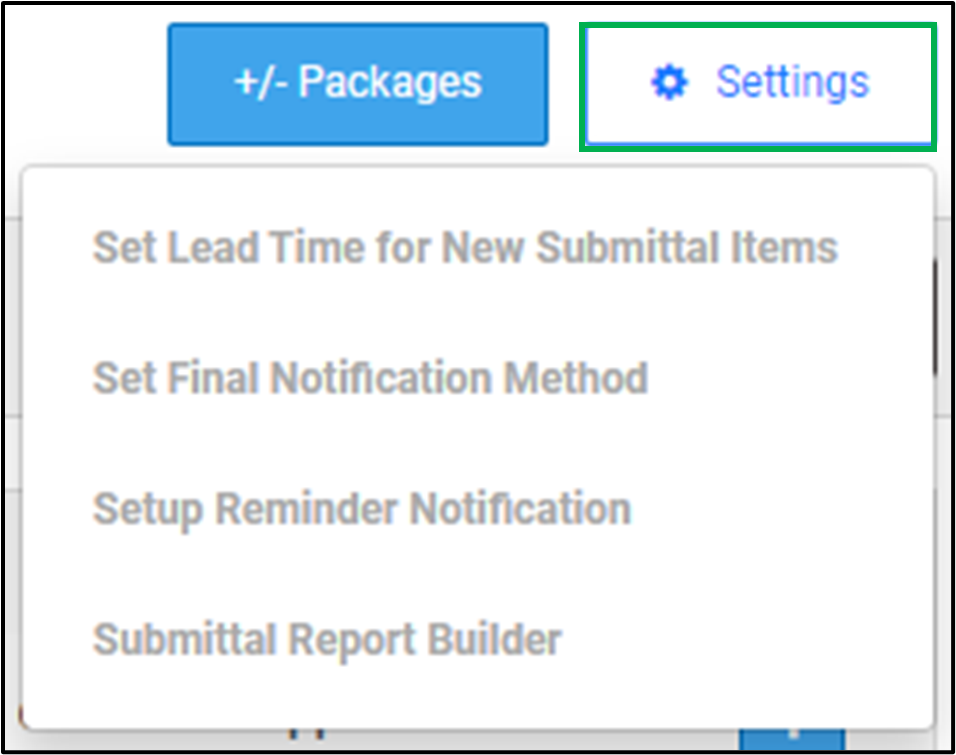
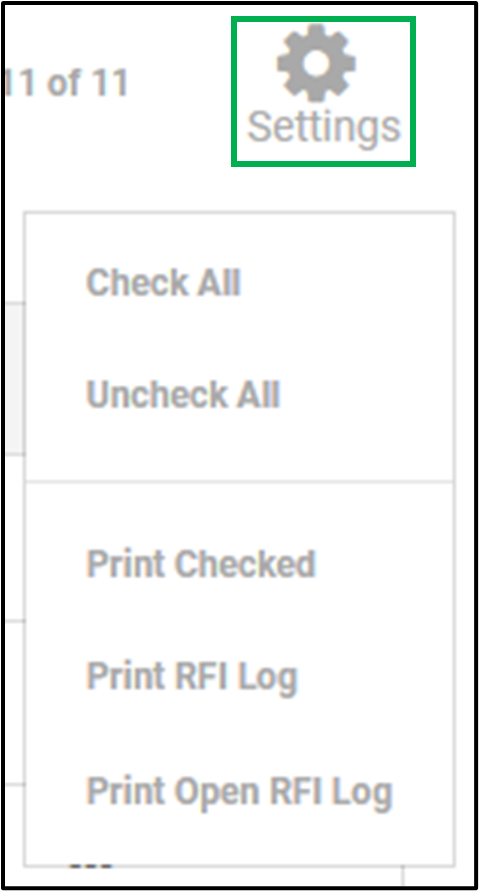
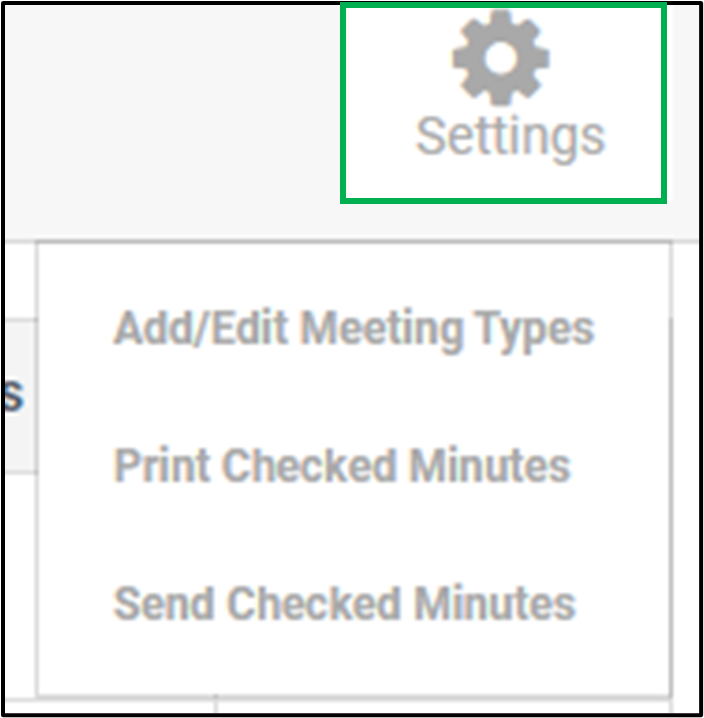
What is the Gear icon used for?
The Gear Icon allows us to manage the entire list of documents. The Gear is also home to Reports and Log as well as the ability to print.
Below are some examples of the Gear Icons we will see in a few modules.
Submittals
RFIs
Meetings
Daily logs

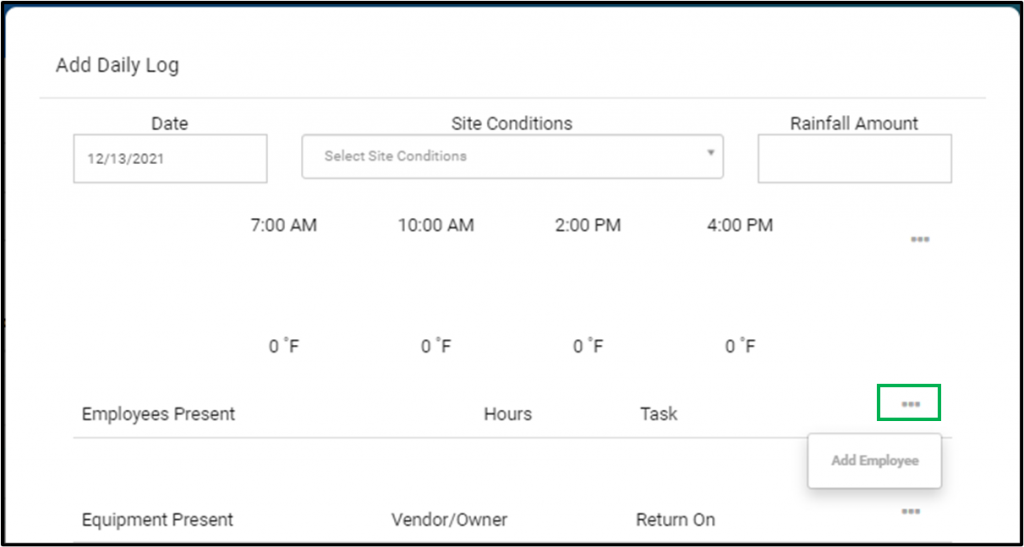
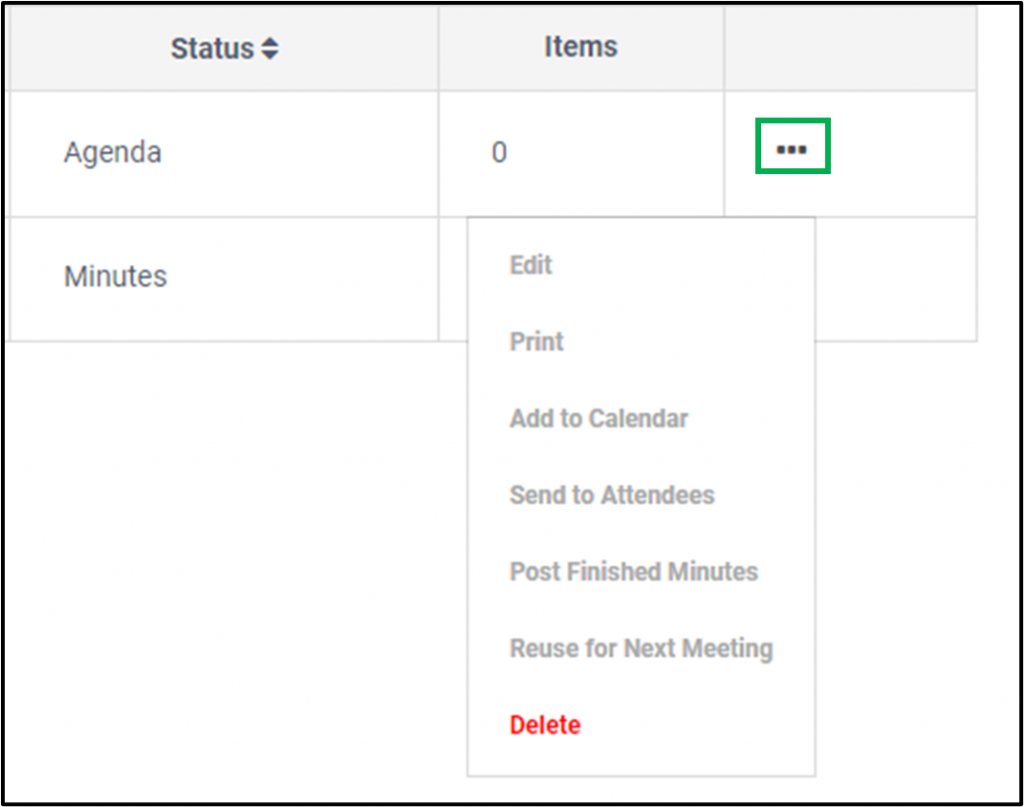
What is the Ellipse icon used for?
The Ellipse Icon is used to add additional information to a specific document. The ellipse icon allows for Editing, viewing, printing, viewing attachments, sending and more. Below are a few examples of the Ellipse Icon menus you will see.
Daily logs
Meetings
How do I navigate the left-side menu?
Use the Left-side menu to manage projects.
To create a new project click the New Project button on the left-side menu.
Use the Carets to expand nested menu items
- Project details – Contains the Project Dashboard and Project Information
- Plan Room- Contains Addenda, Drawings, Specifications, ASI’s and photos
- Bidding- Contains the cost worksheet, Bid invitations, Cost Split, Scope of work, Proposal and the Expanded Division Report.
- Commitments- Contains Award Subs, Purchase Orders, Owner Contracts as well as Subcontracts.
- RFI- Contains the RFI module
- Submittals- Contains the Submittal module
- Meetings- Contains the Meetings module
- Changes- Contains Change Orders, PCO’s and Phases
- Daily Activity- Contains the Daily logs and scheduling module
- Billing- Contains Owner billing and Subbilling
- Briefcase- Contains project documents
- Close Out- Contains Punch list, and Warranty Letters
- Reports- Contains a full list of available reports bases on project status
- Email- Correspondence Module

What Is Shown On The Project Dashboard?
The project dashboard shows a number of helpful features to help keep a project organized.
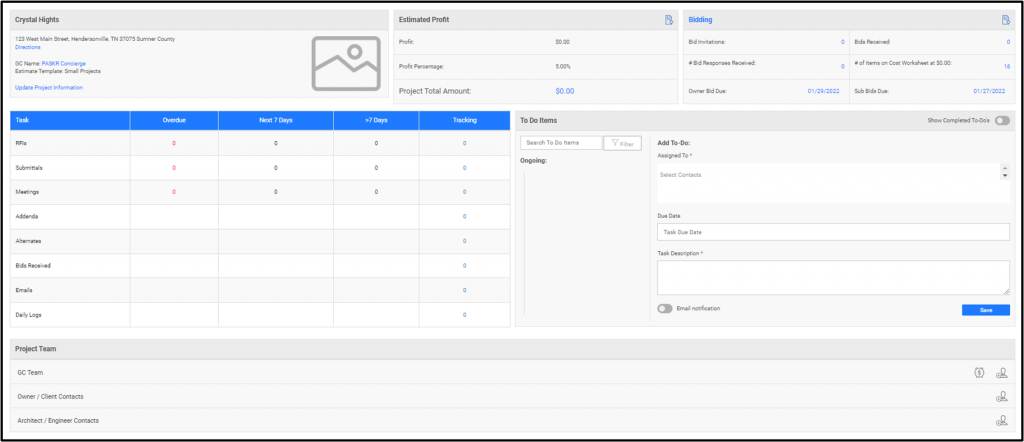
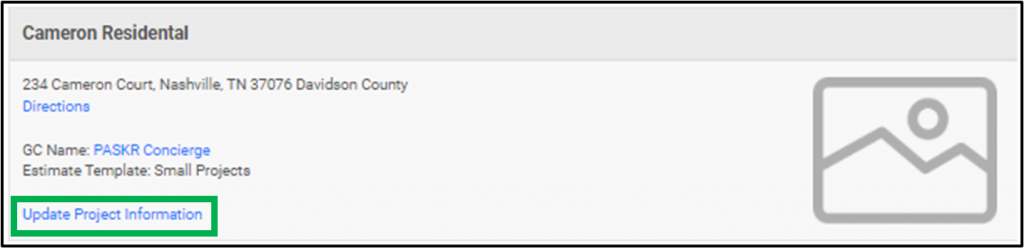
The Project Name card shows the name of the project, the address, the estimate template used as well as a hyperlink to update project information.
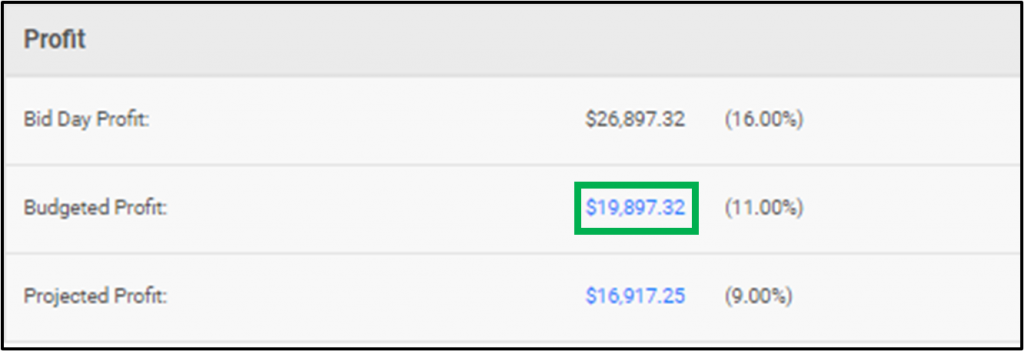
The Profit card provides profit information. Clicking on the hyperlink will open the Original Budget Report.
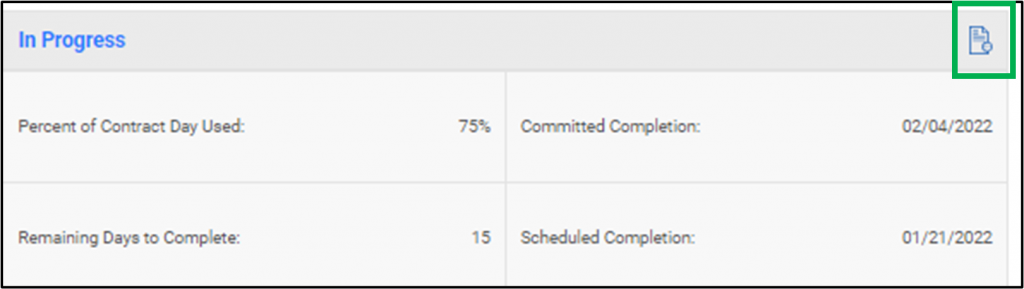
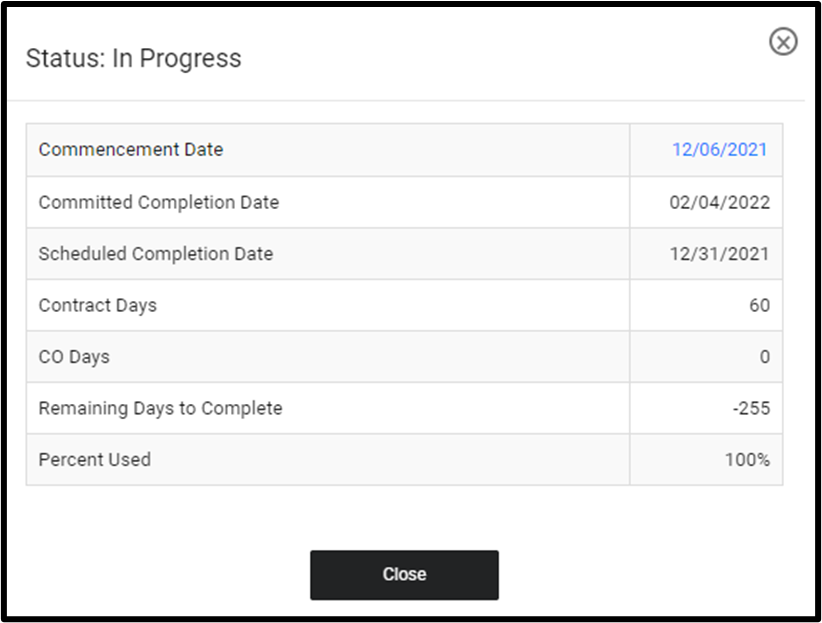
The status card provides information about the status of the project including schedule information. Clicking the paper icon opens another window with more information.
The Task Card provides information about tasks that are overdue, due within the next Seven Days or longer as well as tracking information.

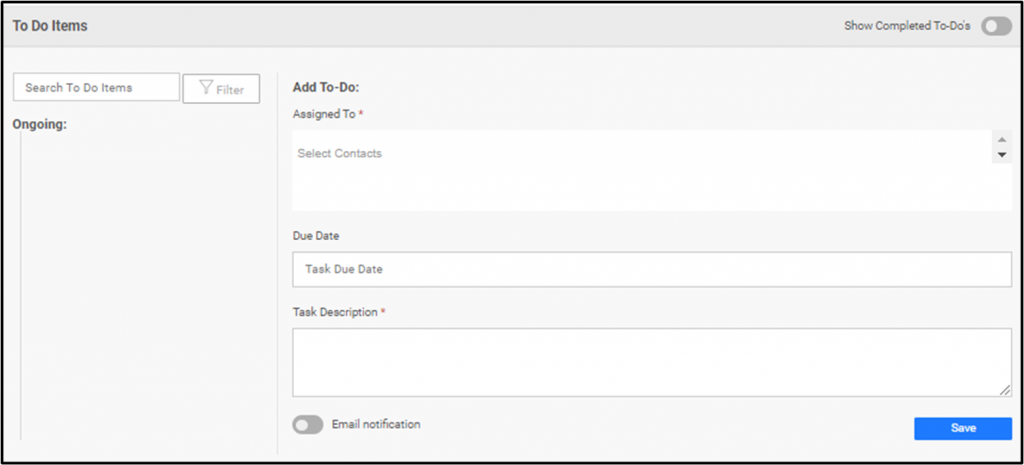
The To Do Item cards allows you to create tasks, assign tasks and due dates.
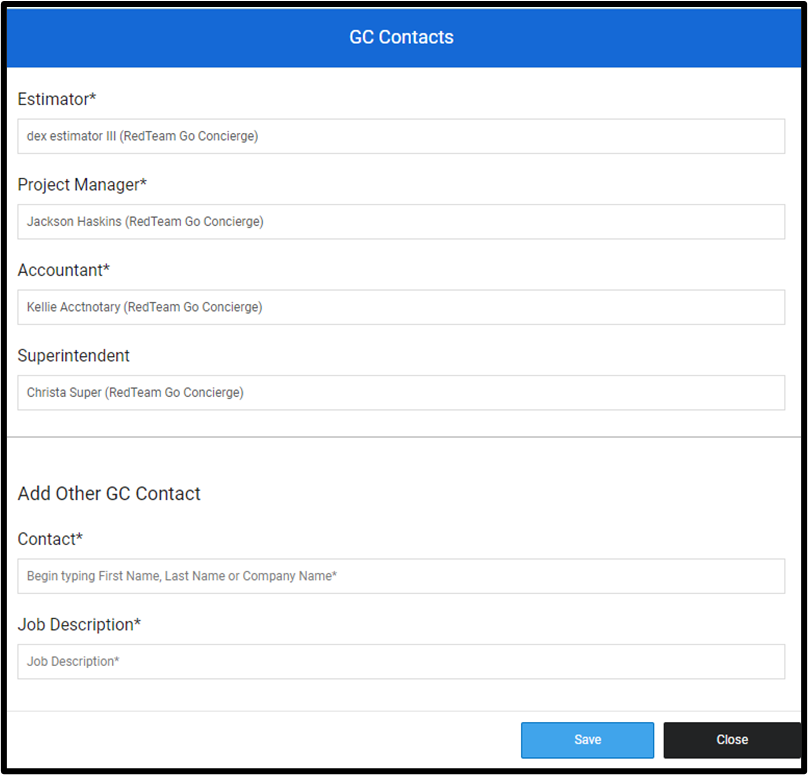
The Project team card shows the project team as well as allows you to add more people to the project team. Click on the person icon to add to the project team.

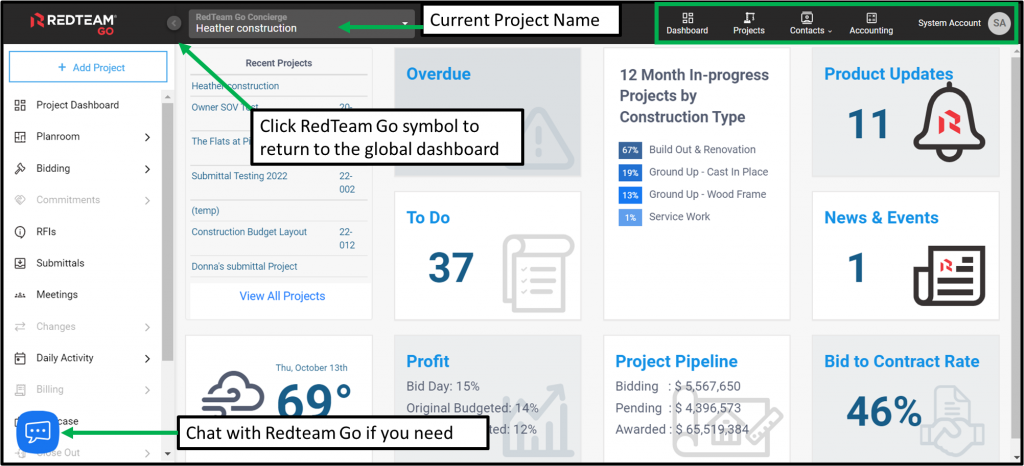
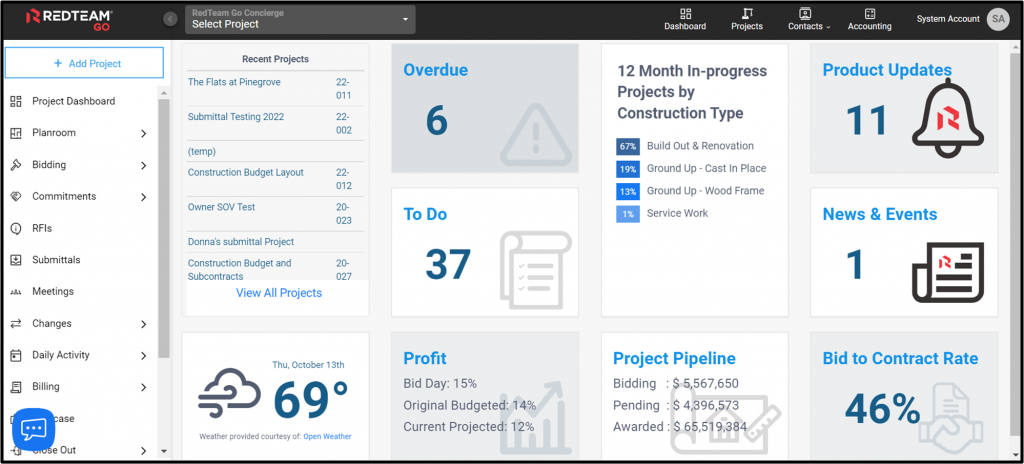
What is shown on the Global Dashboard?
The Global Dashboard has many great features to help you get the most out of RedTeam Go.

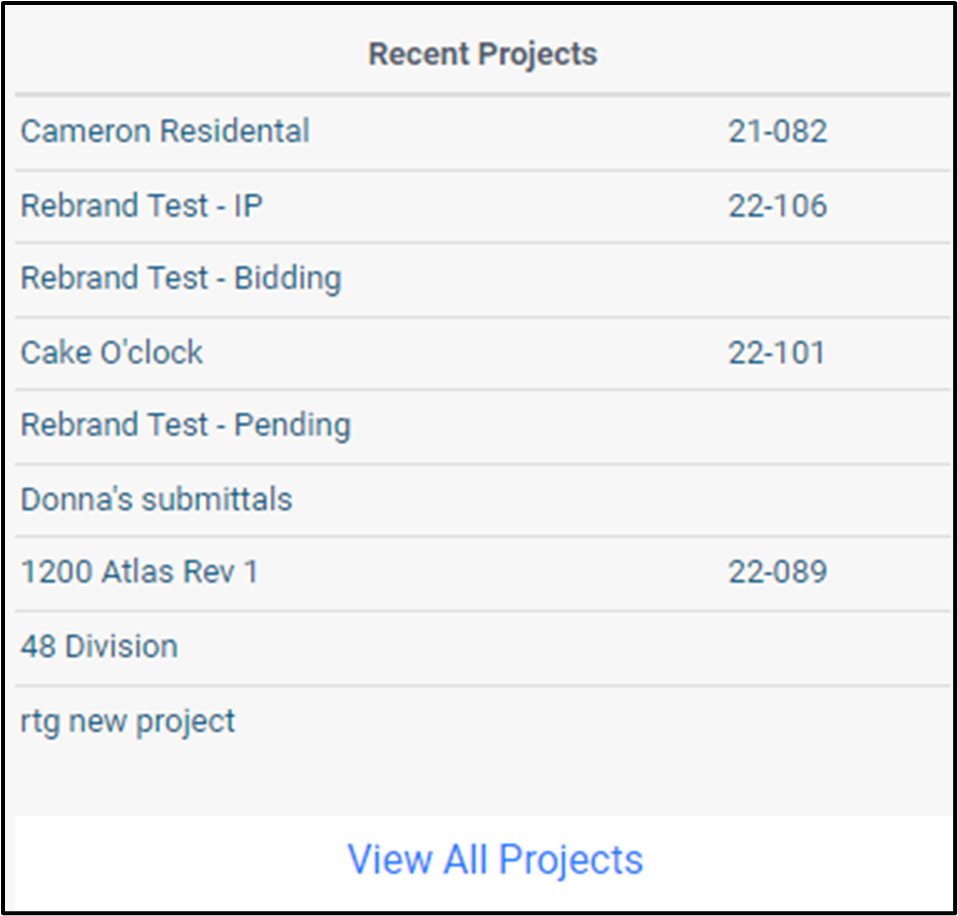
Recent Projects card: Access recently accessed projects or click View All Projects to see a list of all projects.
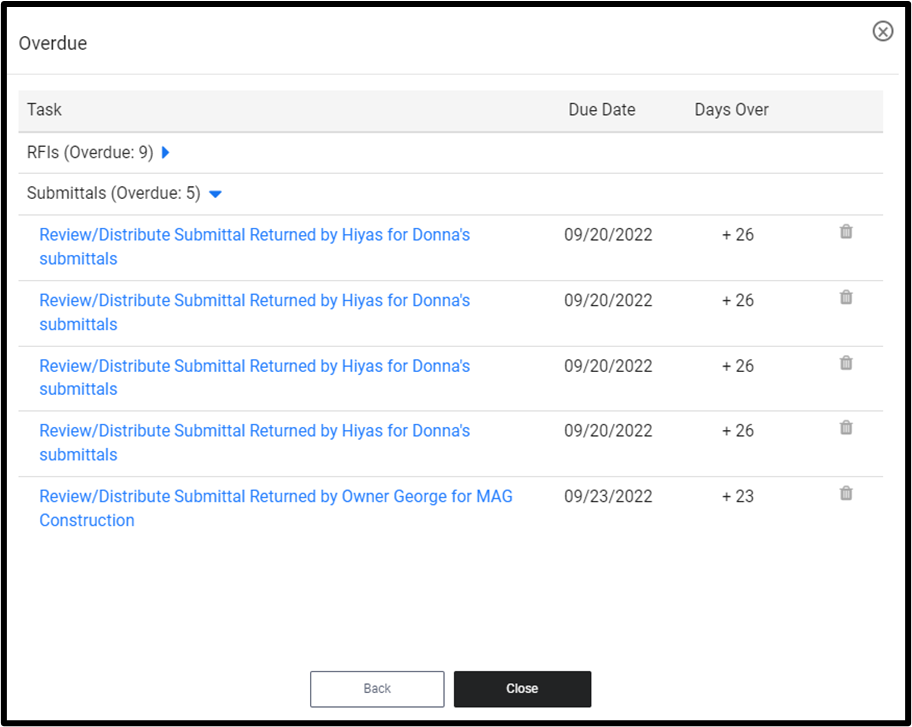
Overdue card – Quickly check your Overdue tasks. This links directly to the tasks so they can be resolved quickly. Administrators will be able to see Overdue tasks for all employees.

Click on the Employee Name to see overdue Items, due dates, and days overdue.

Click on the hyperlink to go directly to the task for completion. Click on the trash can to remove items.
To Do card – Quickly check your To Do tasks. Administrators will see To Do action Items for all Employees.

Click on the employee name, expand task categories.

Click on hyperlinks to be taken directly to the action item

This card will show you the weather for your area.

Click on the profit card to see the budget drill down by project. Administrators will see Profit by employee.

Click on the employees name to open up the jobs they worked on.
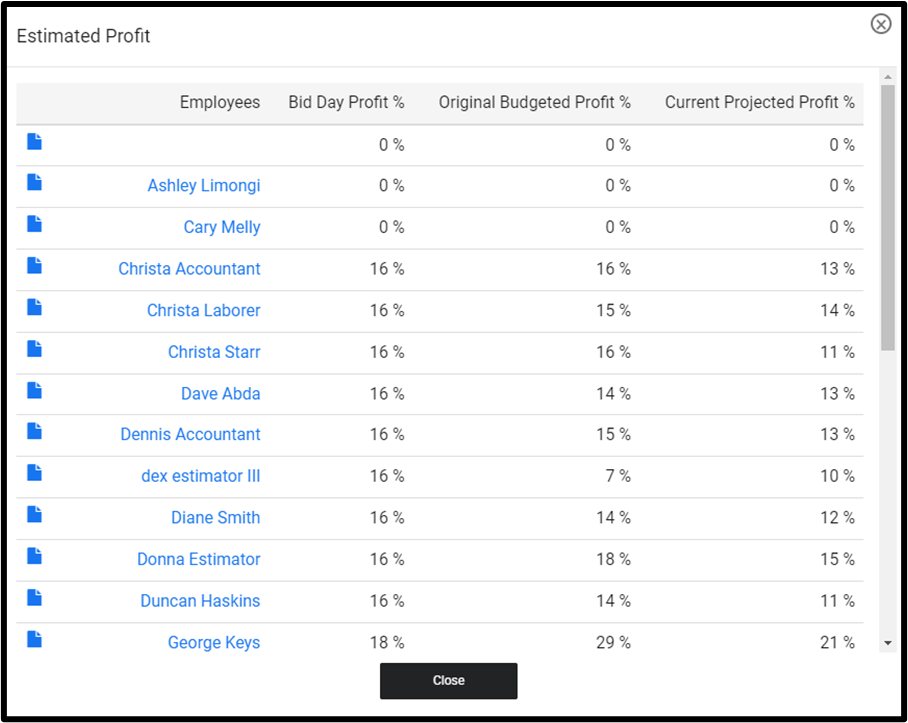
Click on the project name to open the Original Budget report for that project.

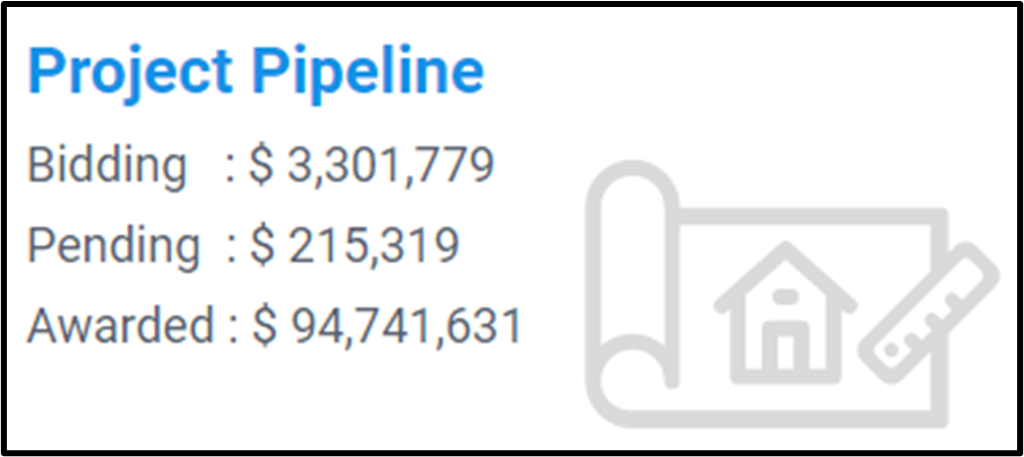
Project Pipeline – The project pipeline shows the value of total projects you currently have in the Bidding phase, Pending status with the total with value of awarded projects (Projects in Will Start Soon and In Progress)
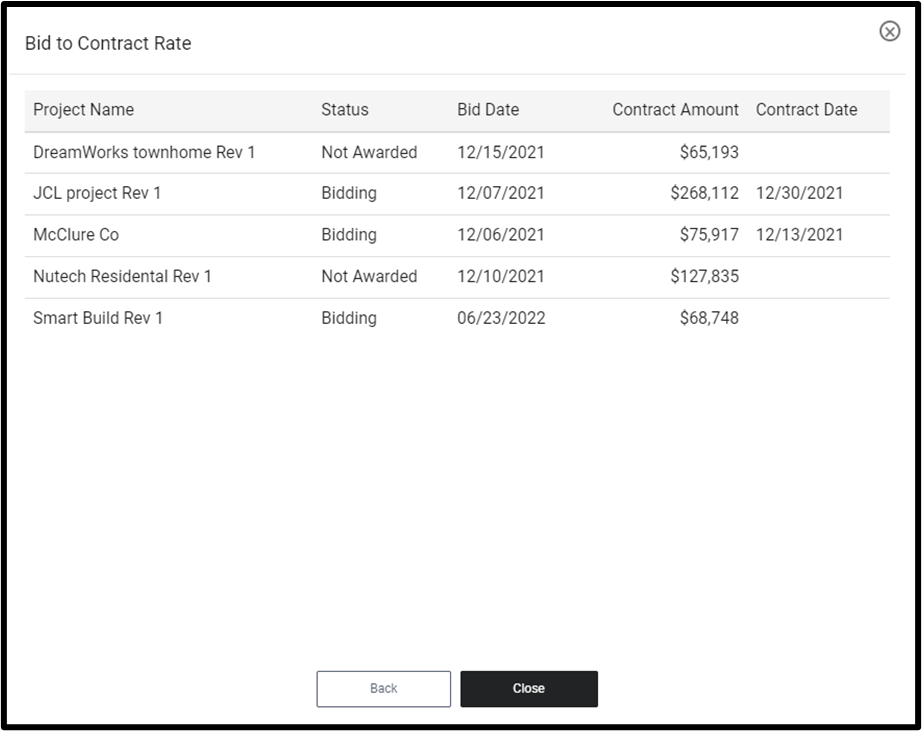
Bid To Contract Ratio – Estimators will see their success rates while administrators will see rates by employee

Click on the Estimators name to see projects won or not awarded.

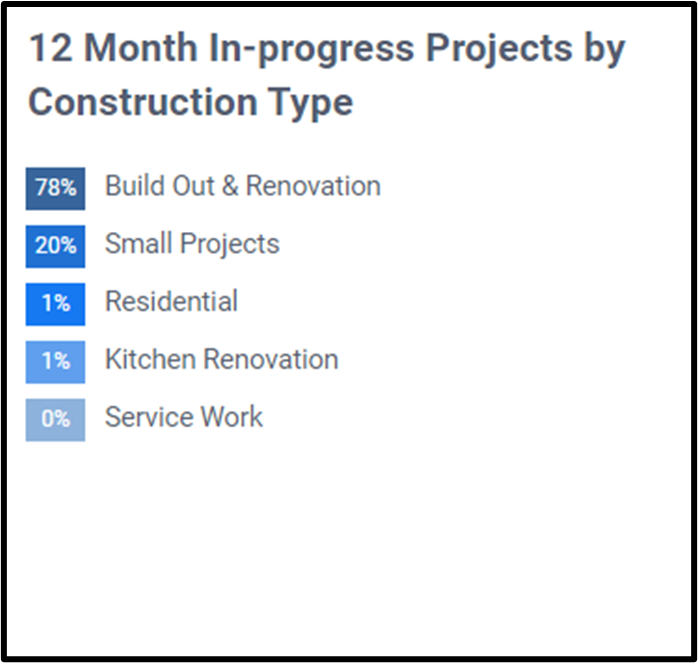
The twelve Month In progress Projects by Construction Type show the percentage of project types.
The News and Events card shows RedTeam Go news.

Project Updates- Shows RedTeam Go updates

How do Superintendents move around in RedTeam Go?
Superintendents can use the Mobile app from the field, but they can also work from the computer by logging into the company RedTeam Go site through a web browser.

Profile icon: The Profile icon allows the superintended to access time cards, and the learning center as well as the ability to change their password.
Recent Projects: The Recent projects card shows a list of the most recently used projects. Click View all Projects or use the Project Icon on the top navigation bar to access all projects.
Overdue: The Overdue card shows tasks that have been assigned to you that are past the due date. Click on the box to open a list and click on the hyperlink to be taken to that task.
To Do: The To Do card will show tasks that have been assigned to you with no due date or that are still current. Click on the box to see tasks and click on the hyperlinks to be taken to the assigned task.

Left-Side Navigation: The Left-Side menu will allow the superintendent to navigate between modules.
Weather: The weather card allows the superintendent to see the weather for the area.
RedTeam Go Icon: This icon will bring you back to the Global Dashboard.

Use the Carets to expand or collapse the modules
Chat icon: Use the Chat icon to talk with a RedTeam Go representative.