The Expenses Module allows costs for projects to be added through the Web Module or RedTeam Go Mobile App. Superintendents and those in the field can submit items from the mobile platform, Project Managers Approve the Expenses and Field Purchase Orders to add to project costs. Accountants can Accept Expenses/ Field Purchase Orders. Acceptance will push those values to an existing Accounting Integration.
To work with Expenses as a PM go to Accounting>Expenses to Access the Expenses List Screen.
Use the Caret Symbol to expand or roll up Expenses and PO by Project.
Use Ellipses to Print, Edit or Approve each Expense and Purchase Order.
Use Filter icon to view only your Projects or switch between Approved and Unapproved Expense records.
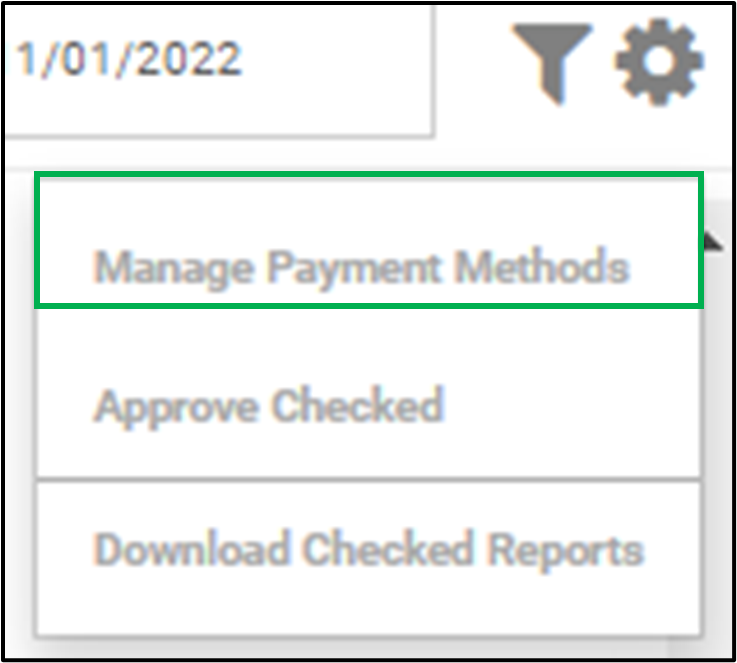
Use the Gear icon to work with the Payment methods that will be selected for each Expenses/ Field PO, approve in Bulk and download reports in bulk.
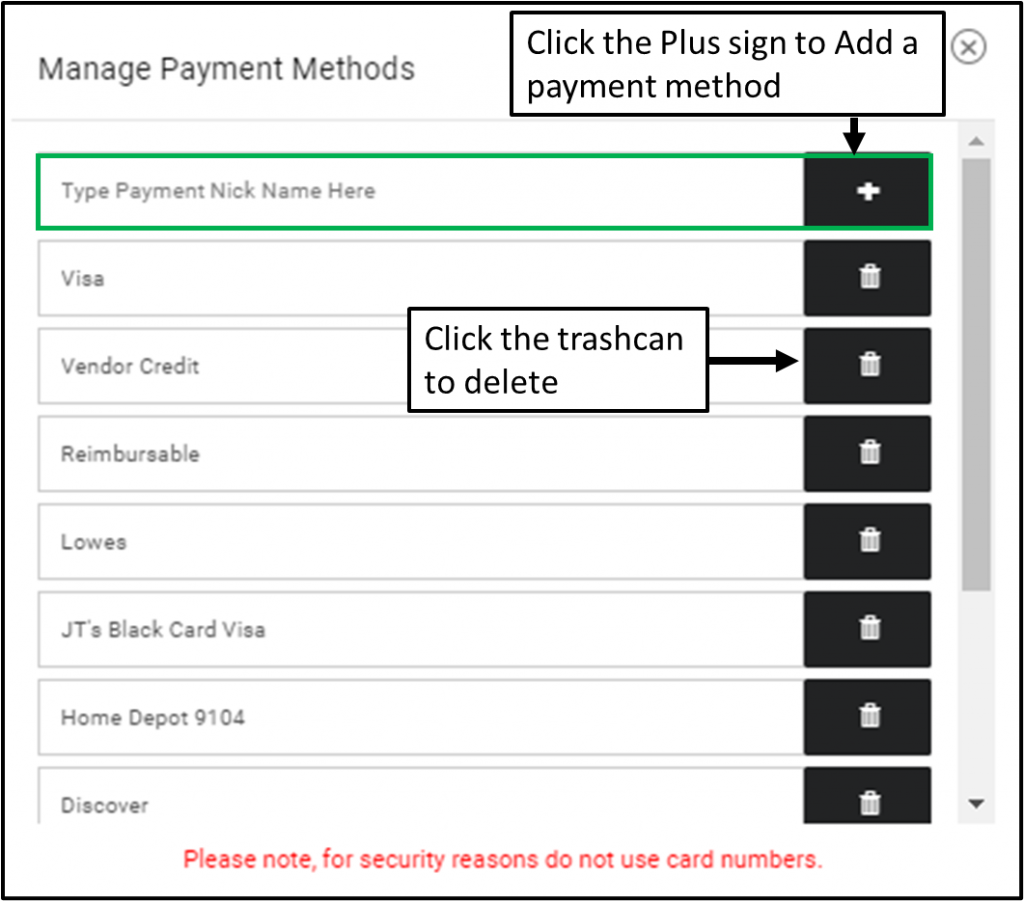
Payment Types can be entered for all company issued credit accounts, so that when Field Expenses and Purchase Orders are created the employee can select which method of payment they used for their purchase.
On the top navigation menu click on Accounting>Expenses.
Click on the Gear Symbol and select Manage Payment Methods.
Type in Payment Type Nick Name and click on + sign to add. Repeat as necessary.
You can turn off this option by having the GC employee with Notary
Go to Accounting > Approve Sub Billing
Click on the Settings Gear Icon
Check the box that says ‘Do Not Notarize Subcontractor Billing’
This will remove the Liens to Notarize Quick Link from view and will not apply the Notary seal when they Accept Sub Bills under the Digital Lien setting.
This option to turn off Sub Billing Notarization is for GCs who may Notarize Owner Bills but either do not require Lien releases from subcontractor, do not need to Notarize signed Liens or who cannot digitally notarize liens in their jurisdiction.
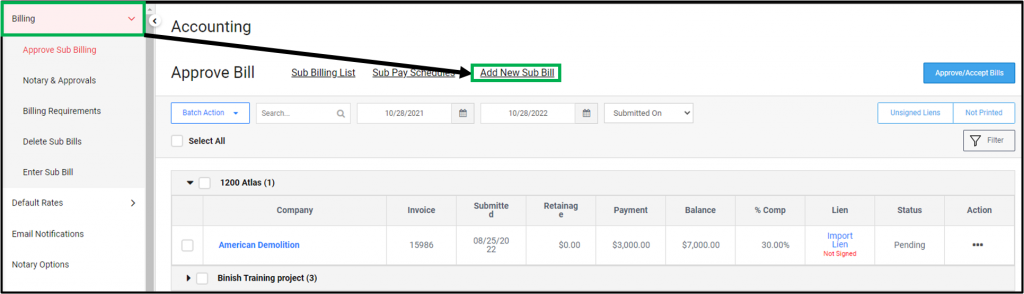
You can enter Sub Bills for Subcontractors with a locked/signed agreement who will not participate in Sub Billing through their portal. The bills prepared this way will use the existing cost code layout as the Schedule of Values (SOV), even if you have the custom SOV rule set under Accounting>Billing>BillingRequirements.
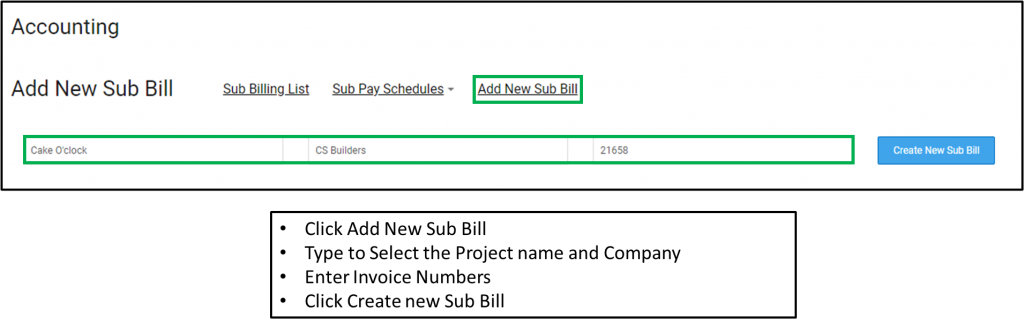
Click Accounting>Billing>Add New Sub Bill
Set the Billing Date Period
Enter bill amounts, either in Work in Progress (WIP$) column or enter a Percent Complete in the % Comp Column. These two cells are linked, entering a value in one will automatically complete the other.
Attach any supporting document, such as a copy of the bill you received from Subcontractor outside the RedTeam Go system. Even if you attach a bill, you will still need to enter the correct billing values.
Submit Bill when complete
Sub Bills entered this way will automatically go to the Approved status since they are entered by a GC employee.
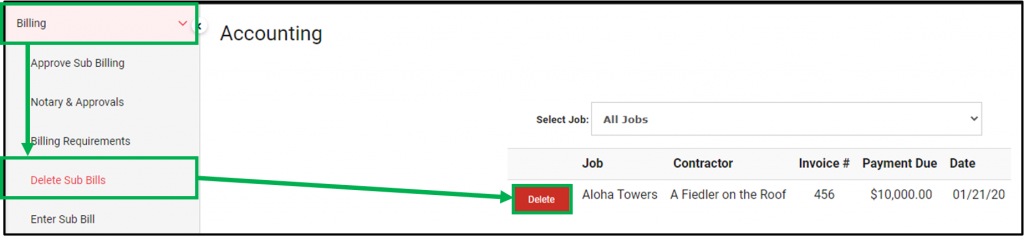
While an incorrect Sub bill can always be returned to a subcontractor to Edit, sometimes it is easier to simply Delete a billing and start over. To delete a subcontractor billing you:
Click on Accounting>Billing>Delete Sub billing to access the list of billings.
Locate the correct bill and select Delete.
NOTE: If you choose to Delete a bill that has later bills already submitted, these bills must all be deleted. Since each bill is based on the previous pay application, the calculations would be incorrect.
See below for a list of emails the Accountant will receive as the project moved forward in Status, and as money is moved during the course of the project.
If the accountant does not wish to receive email notifications on the topics above, they can go to Accounting>Email Notifications>uncheck the box next to the notification email, and it will no longer be sent when that task is performed.
NOTE: This is a Global Setting so the option to send or not send will apply to all Accountants at your company. Certain actions will still permit the PM to select an Accountant and send the notification e-mail anyway. If you are receiving these notifications and do not want them, let your Project Managers know they do not need to check the Accountant’s name and/or send the notification e-mail if they can dismiss it without sending.
To import your contacts database into RedTeam Go quickly and efficiently, use the Bulk Import Template below or arrange your current Excel or .csv file with the same headings as the attached list.
Helpful Hints:
E-mail address – This is the most important piece of information you can include! Without it there is no way to invite your contacts to use RedTeam Go or communicate during the course of your projects! It is much faster to add e-mails to your database before importing so it is worth the time to collect prior to import!
Complete information pays off – RedTeam Go will auto populate your contracts and documents with Company names, Contact names and Address information so including this information will issuing contracts quick and easy!
1.) Contacts>Bulk Import Use the provided template to prepare your contact list.
If you have multiple employees from the same Company, be sure to include the same Company Name on each Employee line so the system will know to nest those employees under the same Company listing.
Be sure to include a heading line in Row 1 for easy matching.
You will be able to add missing information after import.
2. Drag and Drop or Browse to locate the contact import.
3. RedTeam Go will attempt to match the headings in your Import to the corresponding column in your worksheet.
4. Start on the left to confirm or correct these columns.
5. If the top cell description matches the second line click Save and Next and repeat to work across each column
6. If the data match is not correct click on the 2nd line toggle to change.
7. Click Skip if there is no matching column or you need to come back and Edit after releasing a header affiliated with another column.
8. Click Edit to make changes on any column header.
9. Once all Columns are matched or skipped, Finished Matching button will illuminate.
You will see a confirmation for how many contacts imported or failed due to missing information.
10. Click the hyperlink to download the form of Contacts that were not imported. You will also be sent an e-mail of the Failed Contacts Spreadsheet.
Check your Junk and Spam folder if you do not receive the email.
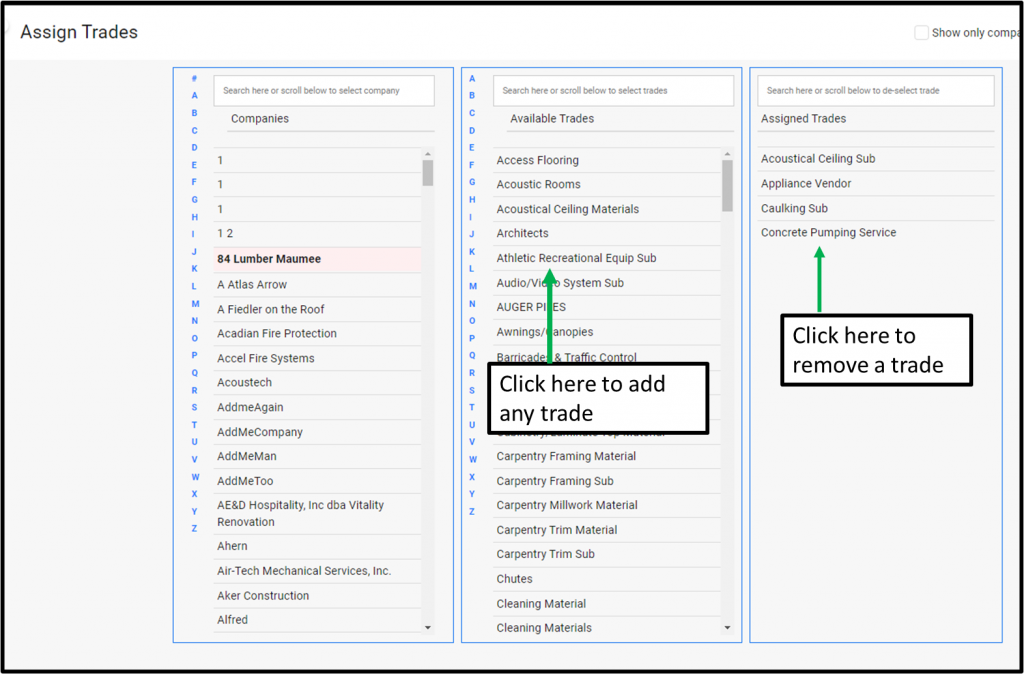
Click on the Assign Trades button to begin to affiliate Subcontractor and Vendors with their Trades.
When you come from Import link the page will show Companies (Without Trades) in the first section. You can toggle between all Companies in your contact database and those without any trades by clicking on the word Companies.
Click on a Company Name to expand the Available Trades and Assigned Trades sections.
Scroll down the list of Trades or use the search bar to select the Trades from center section and click to assign.
Each Trade already has appropriate 16 and 48 Division cost codes assigned to them.
Adding these Trades makes it possible to invite subcontractor and Vendors to submit bids on these items and permits you to award Subcontracts on the appropriate cost codes.
To Remove a trade, click on the name in the far-right column to remove any trades you do not want assigned.
To return to this screen when not using Contact Importer go to Contacts>Assign Trades on the top navigation bar.
From any page in RedTeam Go on the left side menu click Add Project.
Fill out the project form.
Project name
Cost code set
Estimate template
Estimator
GC entity
Construction manager as advisor: yes or no (General contractor not at risk)
Number of owners (1 or 2 owners. 2 owners means that you wish there to be two contracts and two owner bills. EX: building the building shell for one owner and then a tenet build out for the second owner)
Owner
Owner A representative
CG bid due date
Sub Bid due date
Project address
Once everything is filled out, click Add Project
To add the project team navigate to the Project dashboard and add the project team using the person icon on the bottom right of the page.
Fill out GC contacts / Owner contacts / Architect / engineer page.